The key to a successful model railway layout is reliable trackwork. An operating session goes pear shaped very quickly in case of derailments and stalls and with the intention of eliminating these pitfalls I planned & installed the trackwork for Abendstern……..
Abendstern was planned ground up with operations in mind and the layout was designed in a point to point configuration with four distinct areas. The terminal station consisting of 4 platform faces, 2 carriage sidings, a shunt lead alongwith a couple of warehouse and factory sidings ….
 click on pic for larger
an industrial area with a large warehouse and chemical industry along with a passing loop. A loco service facility would also be a part of this section
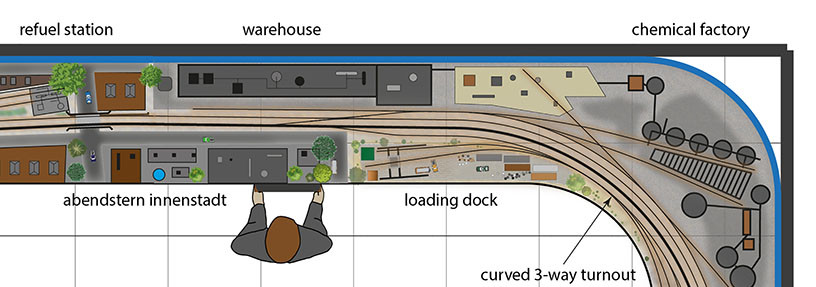 click on pic for larger
A rural riverside scene with two freight loops and a couple of mills.
 click on pic for larger
and finally a staging yard with 10 storage sidings and a cassette system from Train-Safe. To save space the locos would run around using a turntable rather than a loop.
 click on pic for larger
The rural area called for a lot of curved switches which I find difficult to design in 3rdPlanit. Templot, however handles curved turnouts very well even though I find it a bit cryptic to use…..
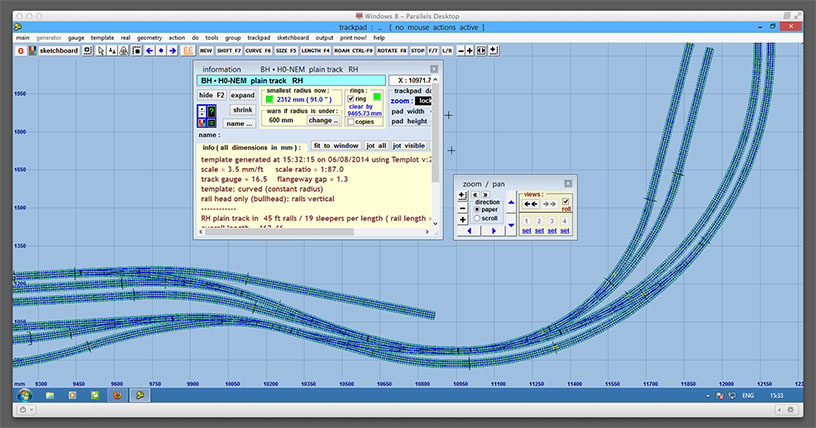 click on pic for larger
I married the two, first by planning for the rural area and it’s curved turnouts in Templot and then importing it into 3rdPlanit……
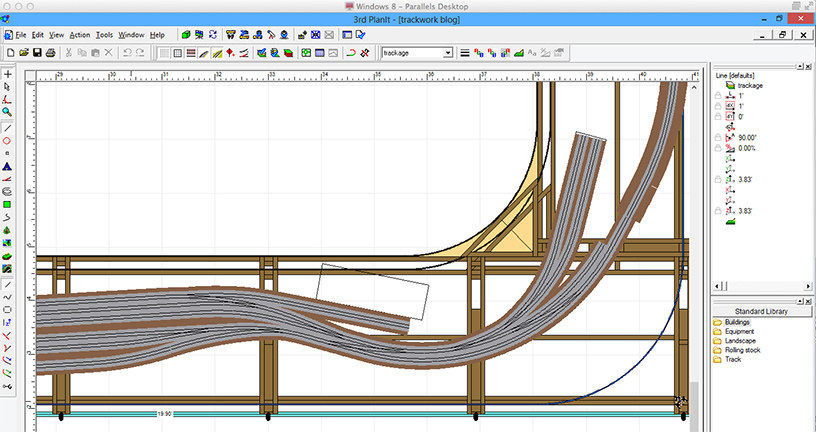 click on pic for larger
The next challenging step was to transfer the track plan accurately to the sub roadbed. I use 6mm cork for the roadbed and use a laser engraver to engrave and cut the track plan onto cork sheets. The track plan from 3rdPlanit is manipulated in Corel Draw, in a manner so as to give the below file in which the black lines are engraved and the orange lines are cut.
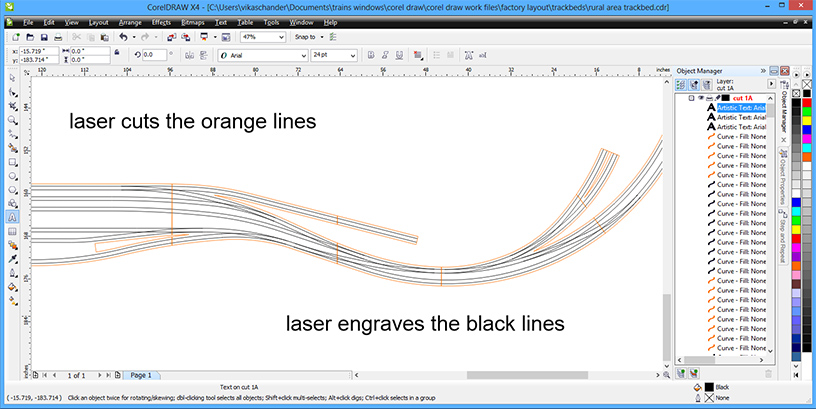 click on pic for larger
The table cutting size of the laser engraver is 32 x 18 inches so i have to adjust the plan into correctly sized blocks.
 click on pic for larger
Below is what the cork looks like once engraved and cut and from here on it is an easy matter to stick them onto the subroadbed with white glue and get an exact trackplan onto the wood

A more detailed explanation of this procedure can be found on another post where i had installed cork on a Fremo module….. click here
The Code 83 track I used was from Tillig, a German manufacturer. This because Tillig makes a prototypically accurate switch – the EW S49 190 1:9 switch – which is appropriate to the era i am modelling. Translated it means a simple switch, with the rail weighing 49kgs/meter, having a diverging radius of 190meters and a 1:9 frog. Below is an accurate scale 1:87 drawing of an EW190 switch from Roman Rachvoll of Bielefeld, shown alongside is a Tillig switch.
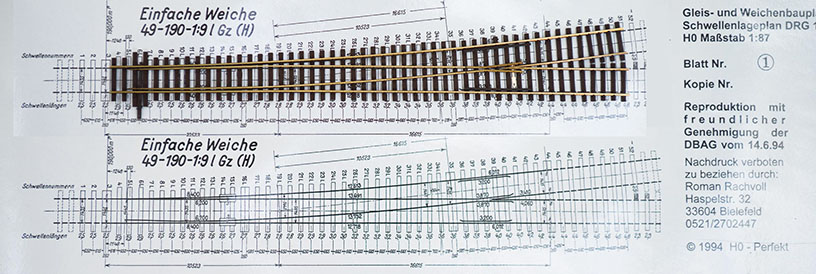 click on pic for larger
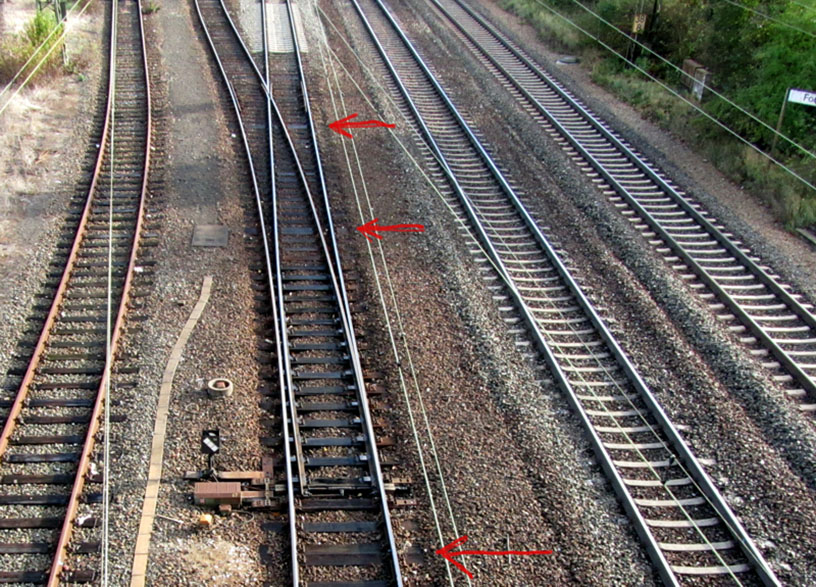
Two compromises exist here. First is that the Tillig switches do not have the double sleeper arrangement (red arrows in left pic) or the exact angled timbering which the German prototype has …
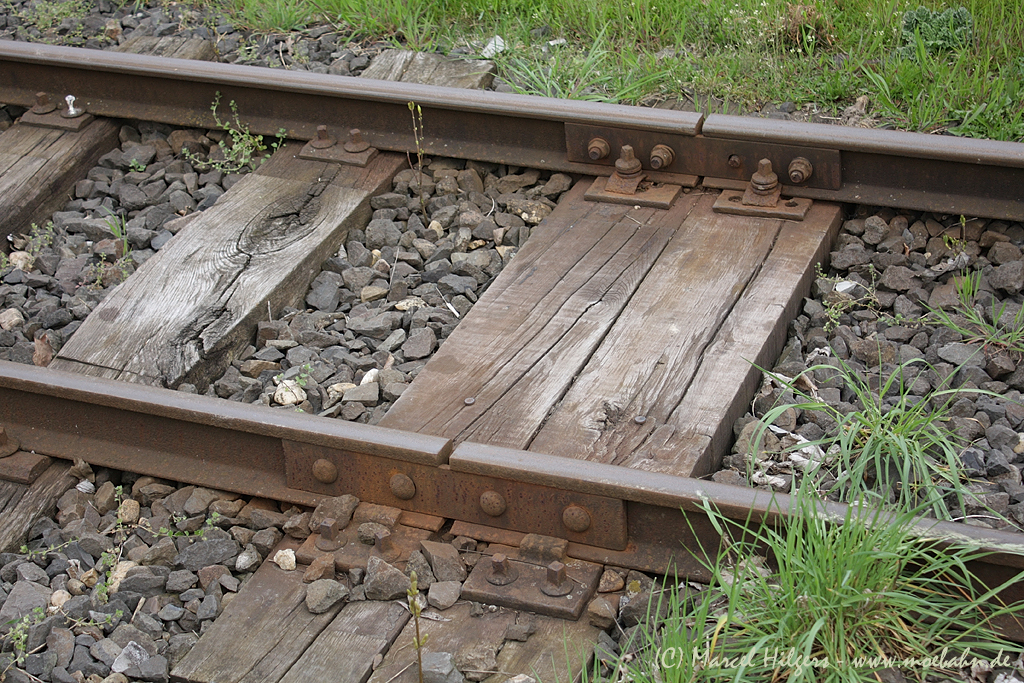
…..and the second is the rail height. The s49 rail height is 14.9cms which when translated to HO scale calls for Code 70 track.
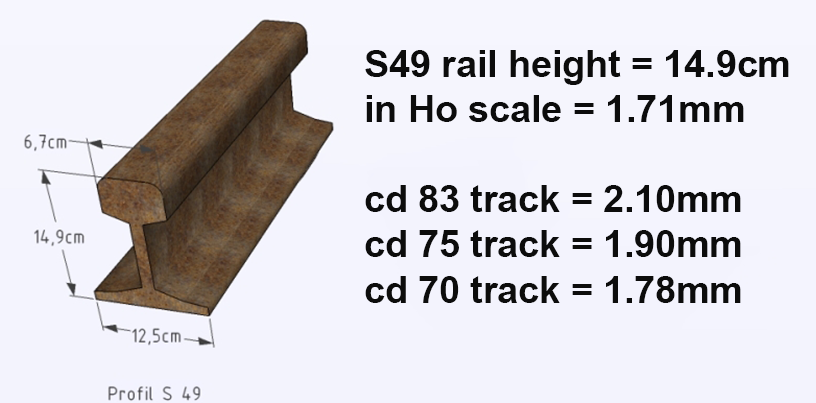
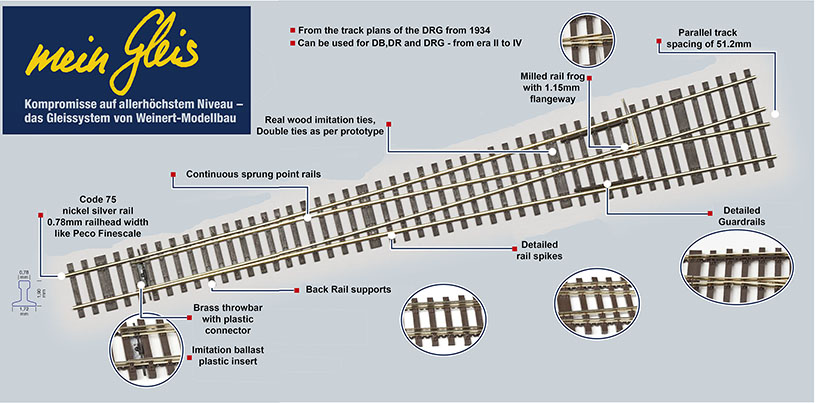
I still regret having made these compromises but now i just live with it since there are no other options but to hand build all the track. Weinert has recently come out with their line of finescale track – Mein Gleis – including a EW190 switch with code 75 rail and double sleeper arrangement, which i wish was around when i had to make my choice of track.
 click on pic for larger
Coming back to Tillig. they also offer a flexible point kit which one can curve into various radii….
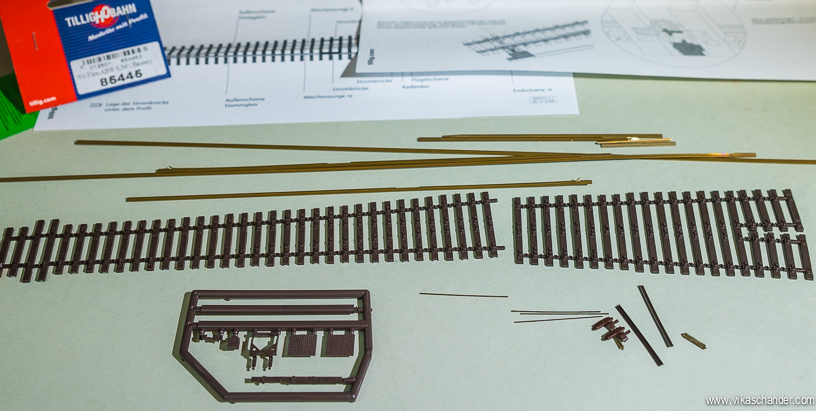
… saving me a lot of grief as the trackplan called for a lot of curved switches……..
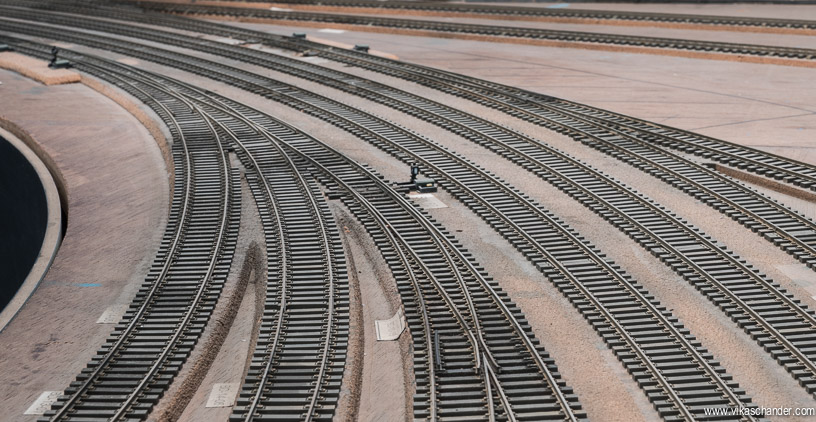
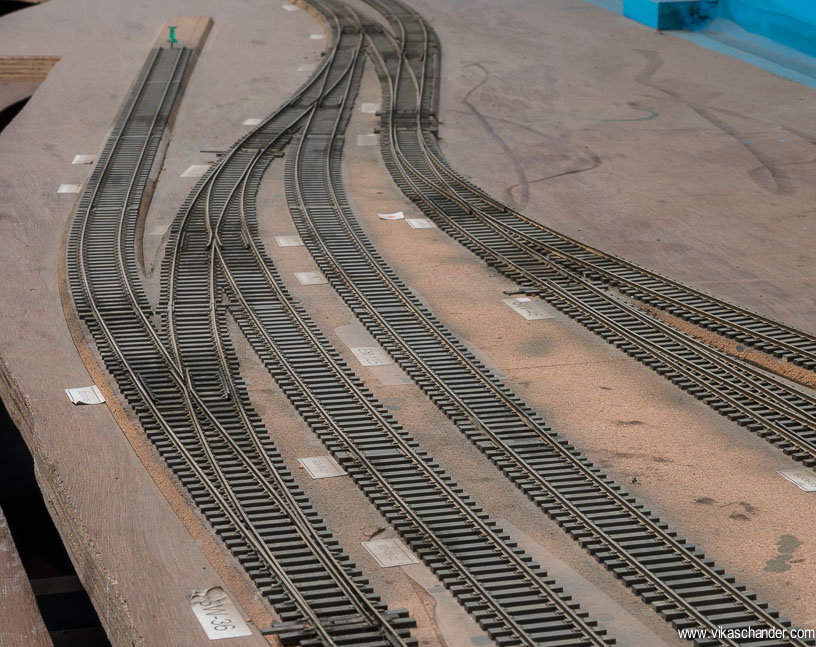
However, Tilling does not make any 1:9 190m switches for special situations such as double slips, 3-ways or crossovers. These situations therefore call for scratch or hand built trackwork and Abendstern has it’s fair share of them …..
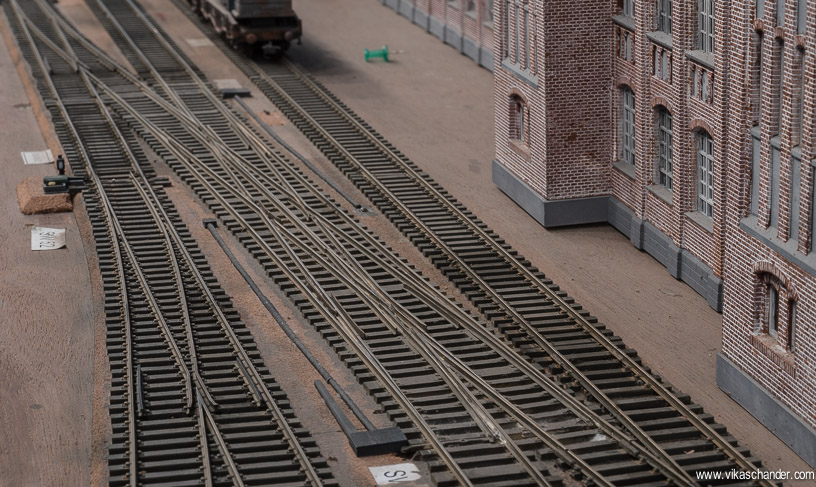
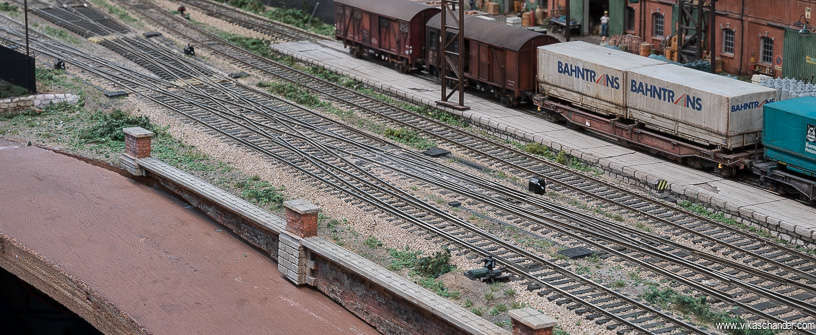
I will digress here a little bit and talk about Tim Warris of Fast Tracks in Canada. For all intents and purposes, I consider him the “guru” of hand laid track. I met him in the NMRA train show in Philadelphia way back in 2006 and have been hooked on to Fast Tracks and his CNJ Bronx Terminal layout ever since…..
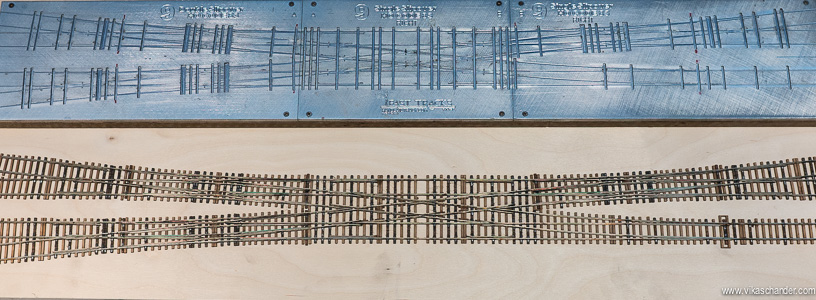
He offers a range of jigs, fixtures & tools using which one can build a wide variety of special trackwork. However, since most of the fixtures he offers are of the American standards, I had him custom build quite a few German switch fixtures such as double slips, 3-ways etc.etc.
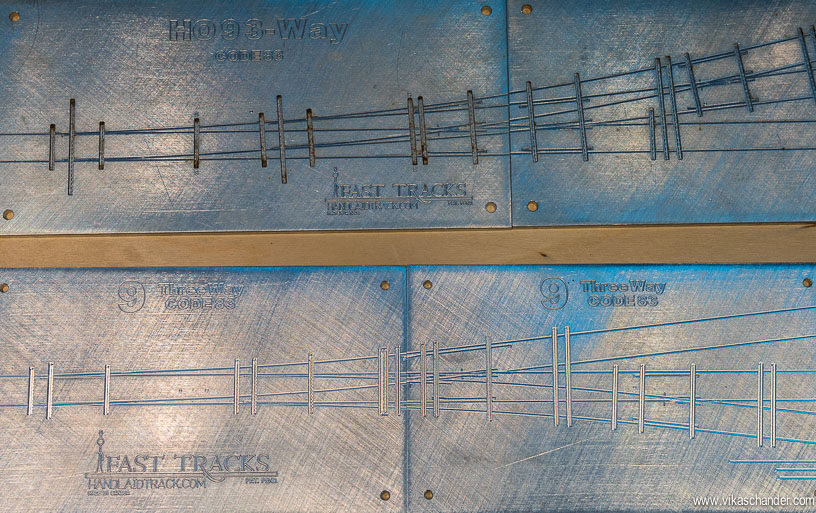
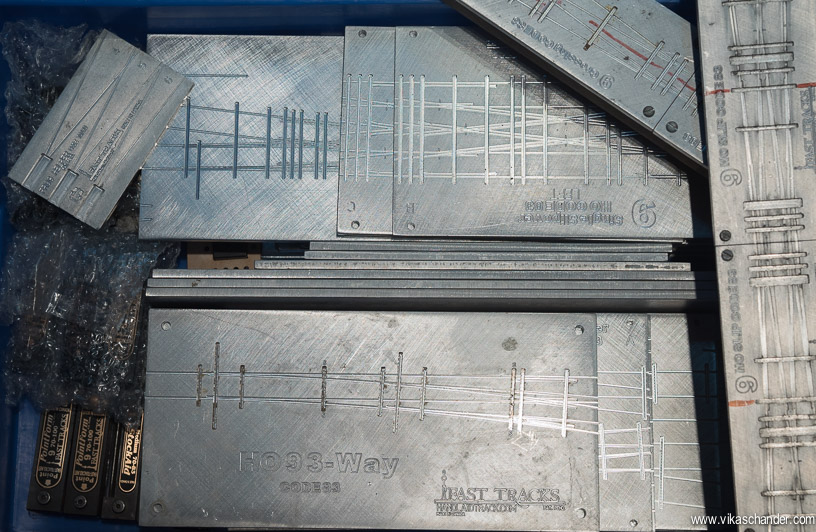
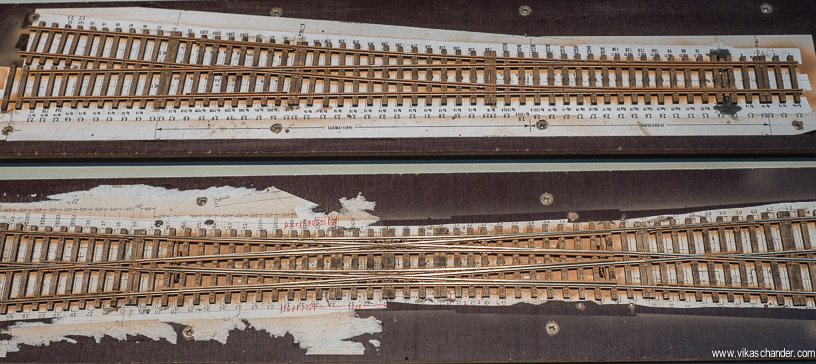
Below is a fixture of a crossover with three double slips and the monstrosity which came out of it …….
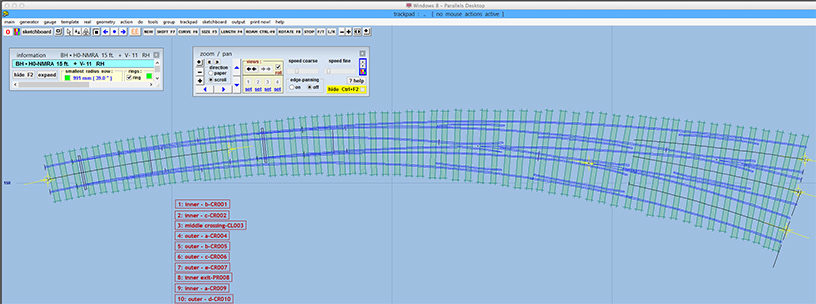
I also use Templot to draw up some switch templates…..
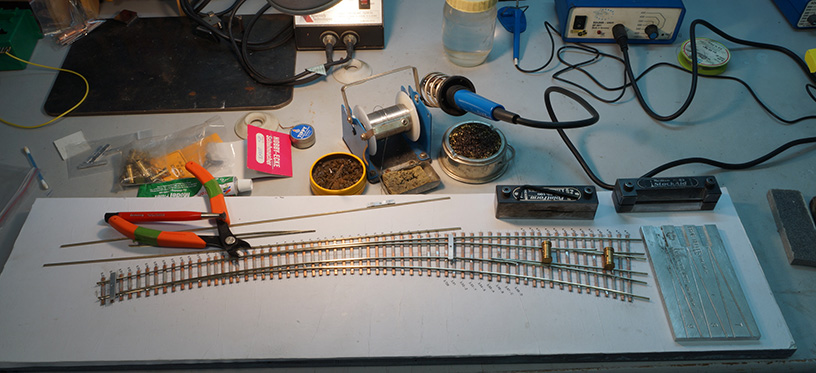
….and then use the copper clad method using Fast Tracks jigs and tools. Below a curved 1:9 3-way switch under construction on a printed Templot template…..
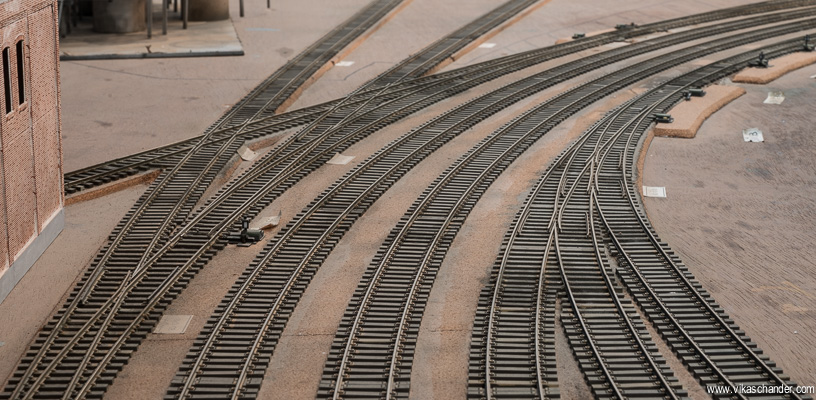
…and below a left hand version installed on the layout.
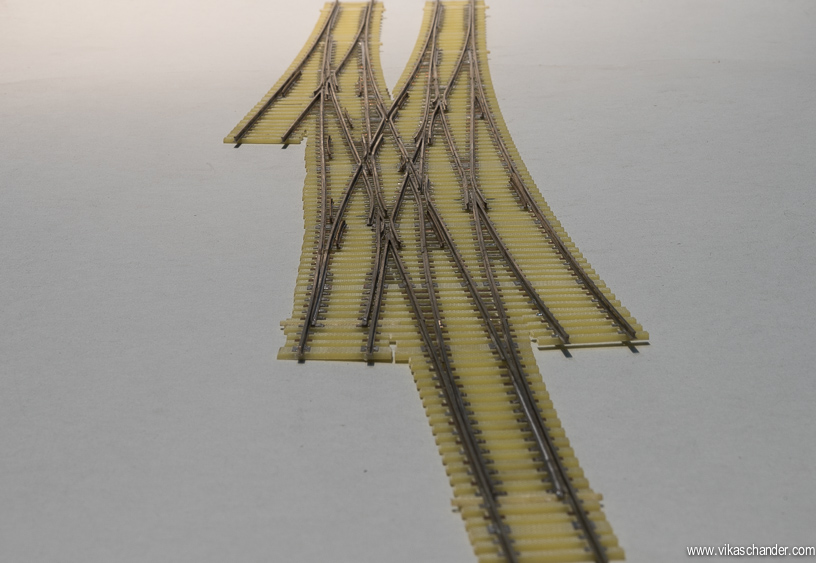
In the last couple of years I have also commissioned special points and trackwork to Heiner Tondorf from Oberhausen, Germany. He has a slightly different approach where he CNC’s PCB’s in the shape of turnouts , leaving just the nickel silver where the rails and frogs are then soldered onto.

He has made some pretty complicated trackwork for me, which at the moment I have just collected and kept for use in some future magnum opus ….. below is some of his work.

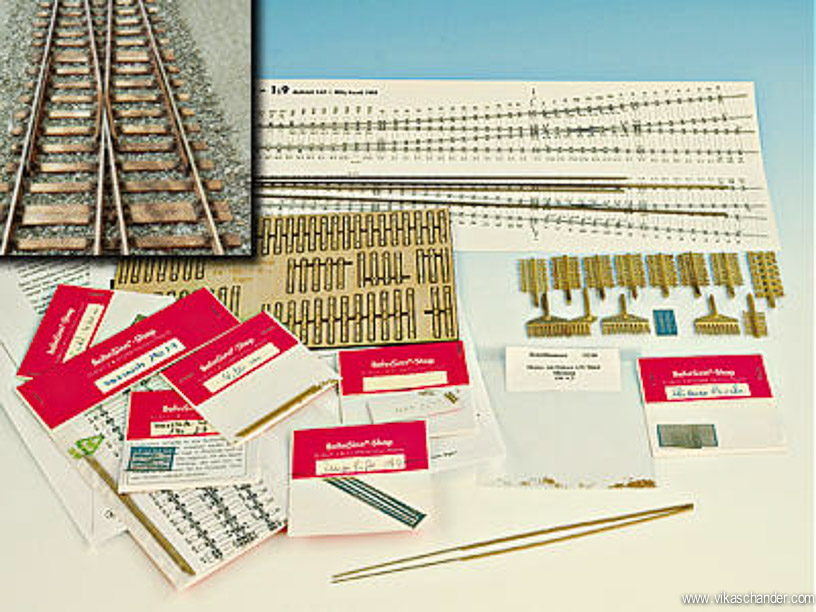
While on the topic of scratchbuilding German prototype switches, no discussion would be complete without the mention of Willy Kosak who offers all components needed to make Proto 1:87 switches, under the company name of Bahn-Sinn. Incidentally, he is also the publisher of the very slick German model railway magazine – Hp1. Possibly the best model railway magazine out there catering specially to the needs of the German Finescale modeler.
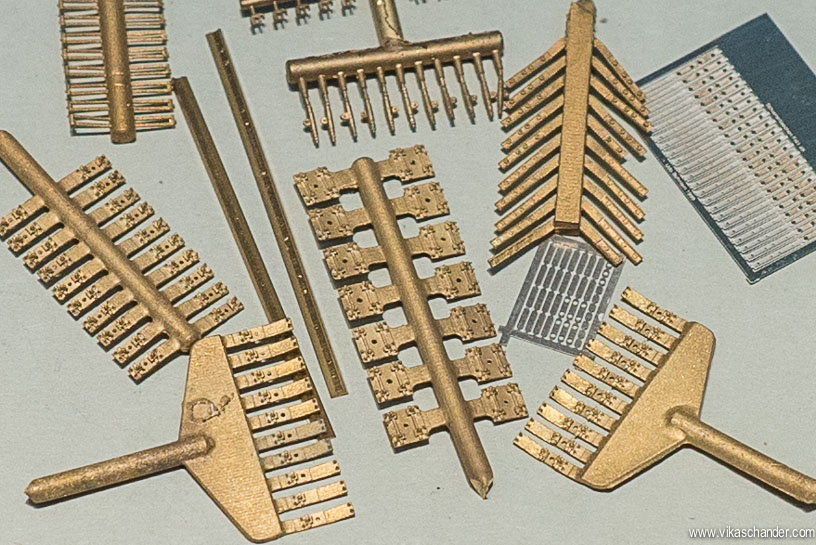
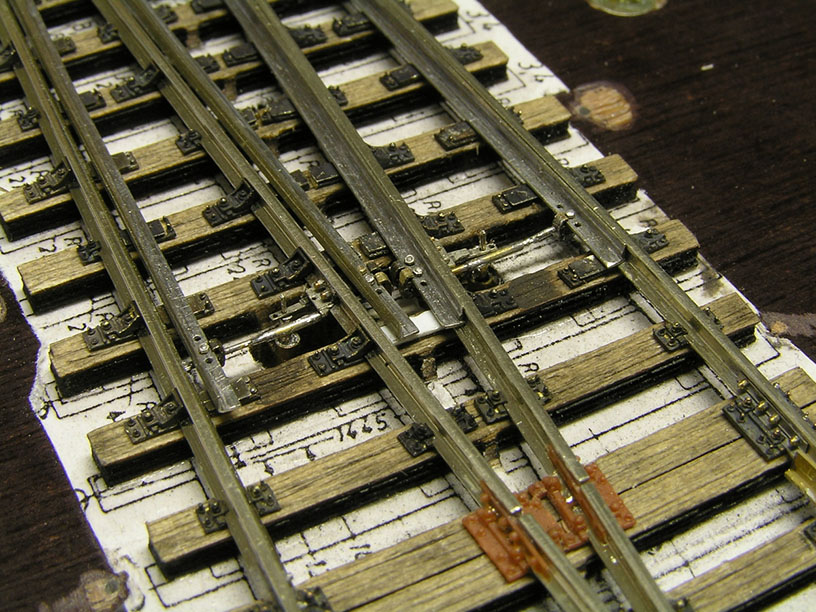
Thomas –Steffen Langner – AW-Cannstatt – from Stuttgart is another master craftsman who took on the task of putting these components together….. Looking at the pic below, don’t forgeet it is 1:87 !!!…..one can see & appreciate the amount of craftsmanship and work which goes into the construction of a Proto87 double slip switch….
 click on pic for larger
I commissioned him to make seven points and a double slip couple for me, which I have yet to use but just feel good having in my possession. One day when my skills are where they need to be, then I will attempt a Proto87 layout !!!!
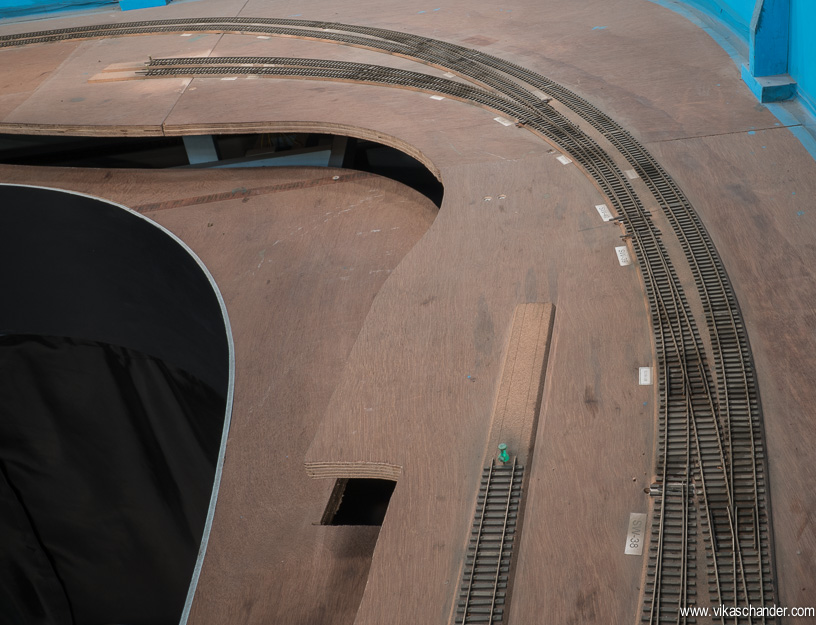
The minimum curve radius on the layout is 60 inches, this more to achieve a smooth and flowing look rather than to achieve any operational reliability for which I feel 30 inches suffices.
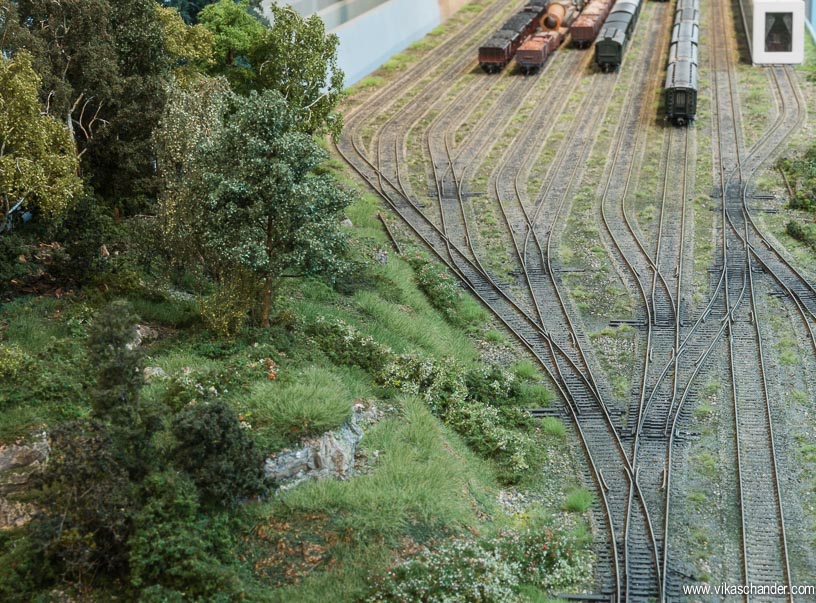
The staging yard does not use the longer Tillig switches so as to save on space. Here I use the Peco cd83 #6 switches…..
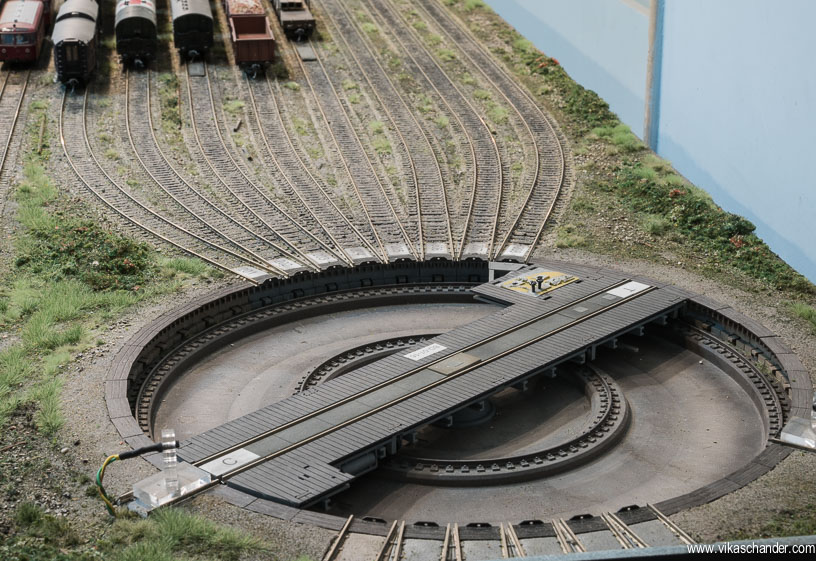
I did not have any space to make a turnback loop so I used a turntable at the end to turn and run around the locos.
I have not dwelled upon some of the tips, techniques and tools i have used to lay down the trackwork of this layout , but the Fremo Modular Layout category, covers them extensively so please do have a look there as well.
All in all , installing the trackwork was a real joy and it went fast and easy. It served as a lesson to me that good planning and practices will always yield good results. Making the effort up front, resulted in a smooth flowing and running model railroad which is certainly a joy to operate with few gremlins.
excellent! precision design. I would like to see the tools and templates, dimensional data etc in one place or linked
Vikas, I only recently came across your site – I love it! Outstanding modelling and extremely well written articles.
Regards.
Neil
I keep coming back to your blog and going through all the detailed descriptions and pics over and over again. And every time I learn something new!
I love the way you select and assess each product for it’s suitability. Your eye for detail in selecting the right components combined with the patience which allows you to see this process as necessary is quite a skill to have! Great modelling, great planning and fantastic project management skills!
Always a pleasure to read your updates. You have a very methodical, logical and yet entertaining style. Please keep us posted as your layout progresses. Your attention to detail is admirable. Perhaps George Sellios should be looking over his shoulder. Keep up the great work! Can’t wait for your next post!
regards Don P
Fantastic update Vikas! As always, I enjoy your model railroading updates the most. Some excellent tips and resource information here – should be very helpful in future when I make a move towards German models and HO scale.