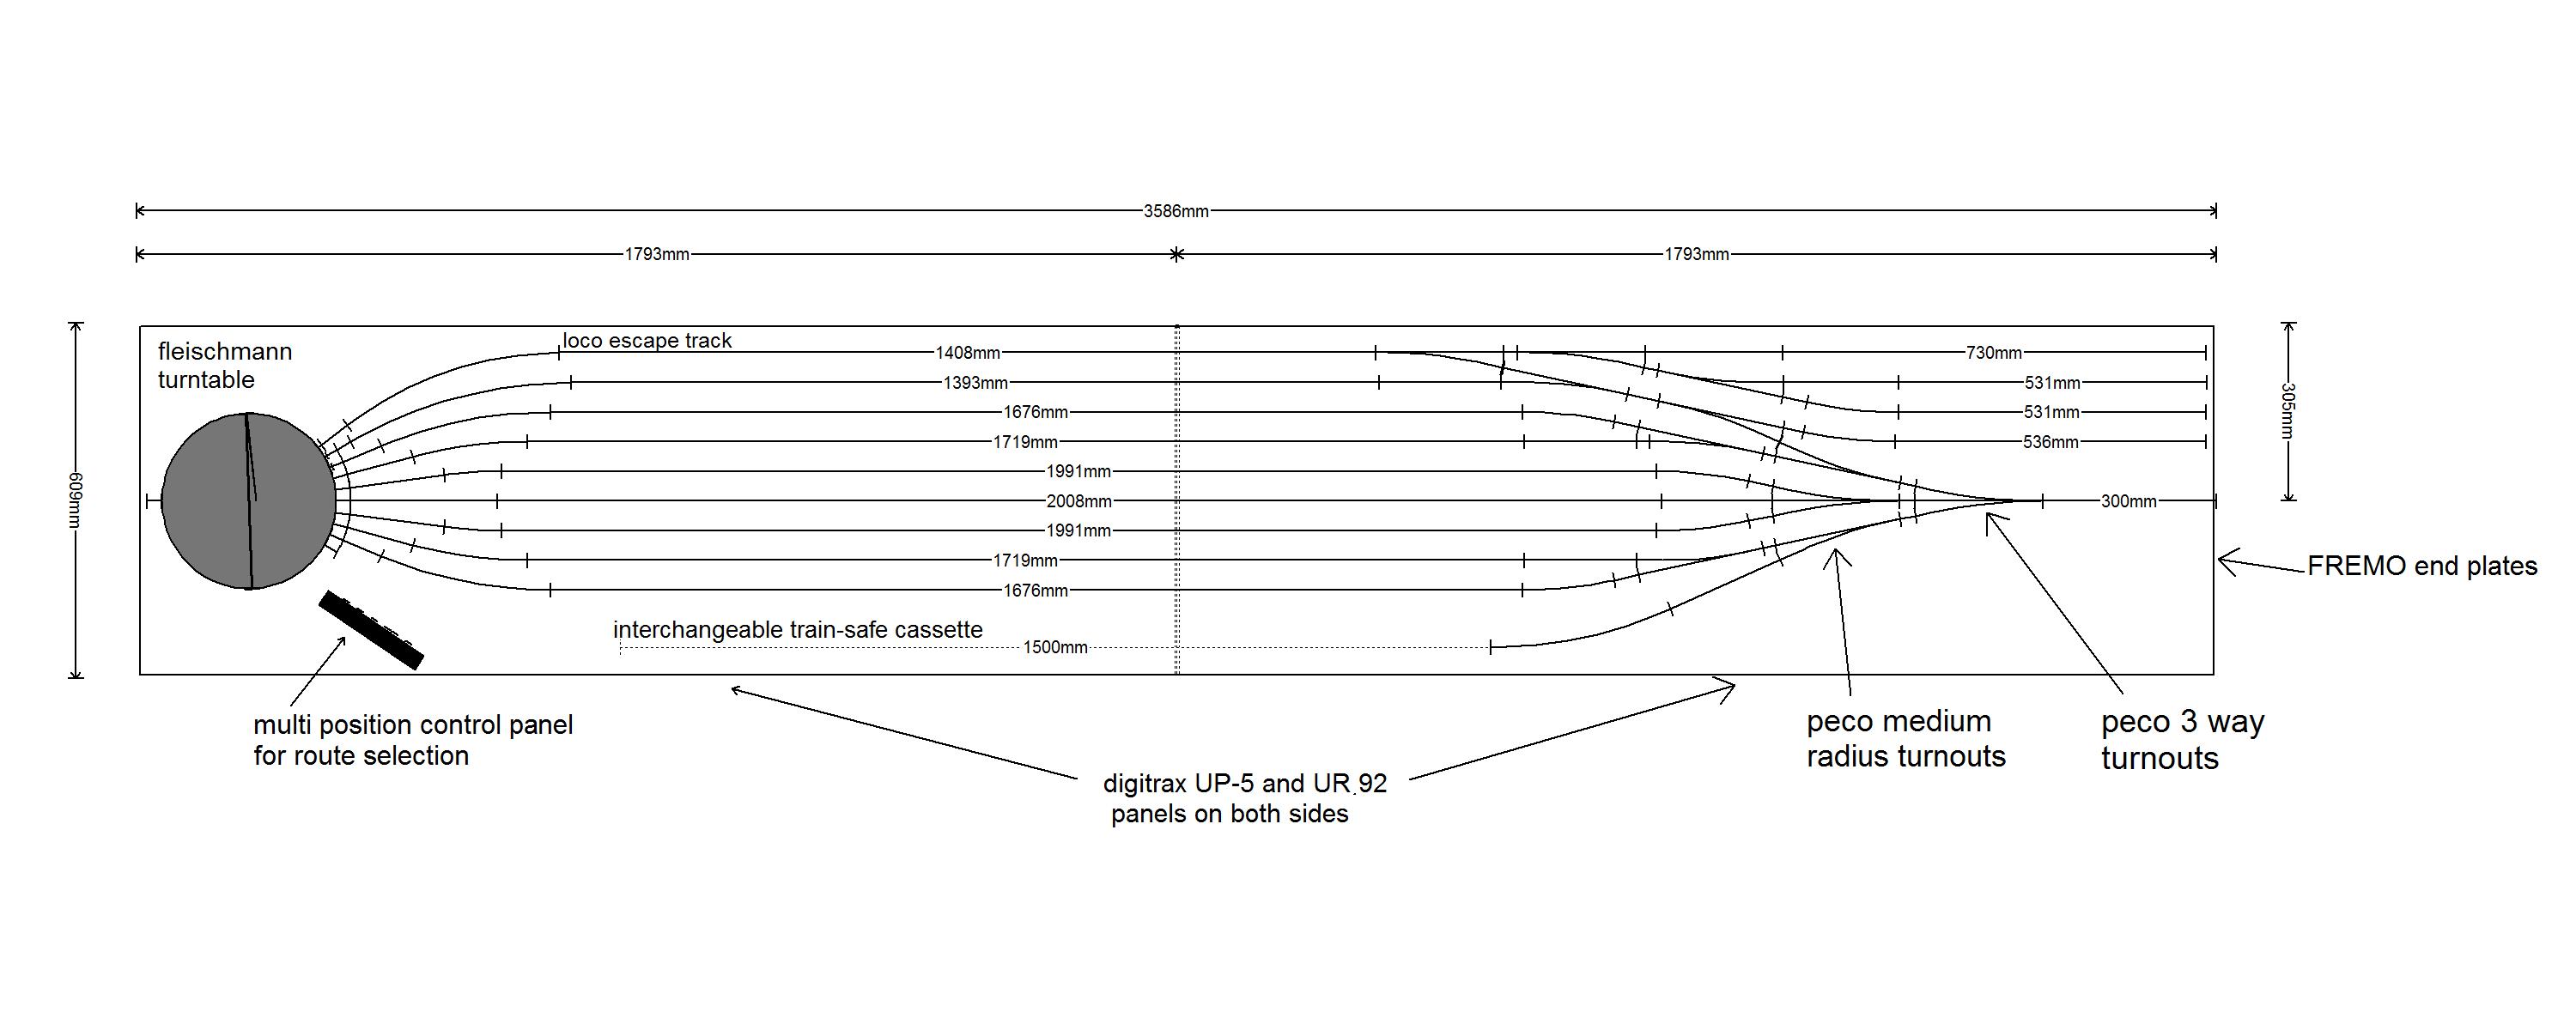
One of the issues which really bothers me , and probably plagues other model railroaders is how to transfer the track plan accurately to the wood or sub base of the layout , or in my case the modules . What i have been doing of late is to engrave and cut the track plan onto cork sheets of 32×18 inches – which is the table cutting size of the laser engraver I happen to have…… and then stick this onto the sub-roadbed or ply and lay the track on top of that.
first of all the track plan is perfected in 3rd plan it …….as also seen in an earlier post .…
 click on pic
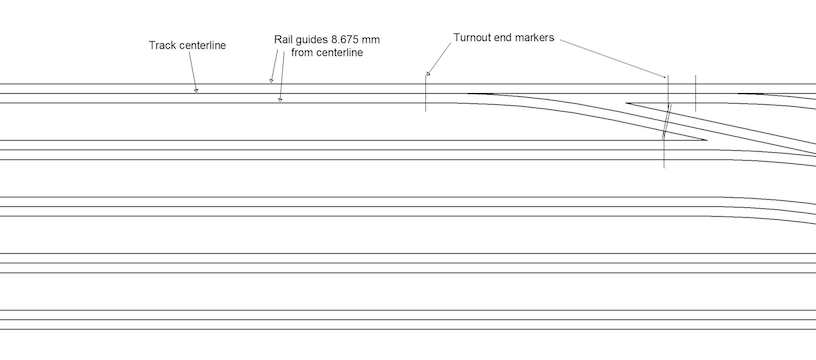
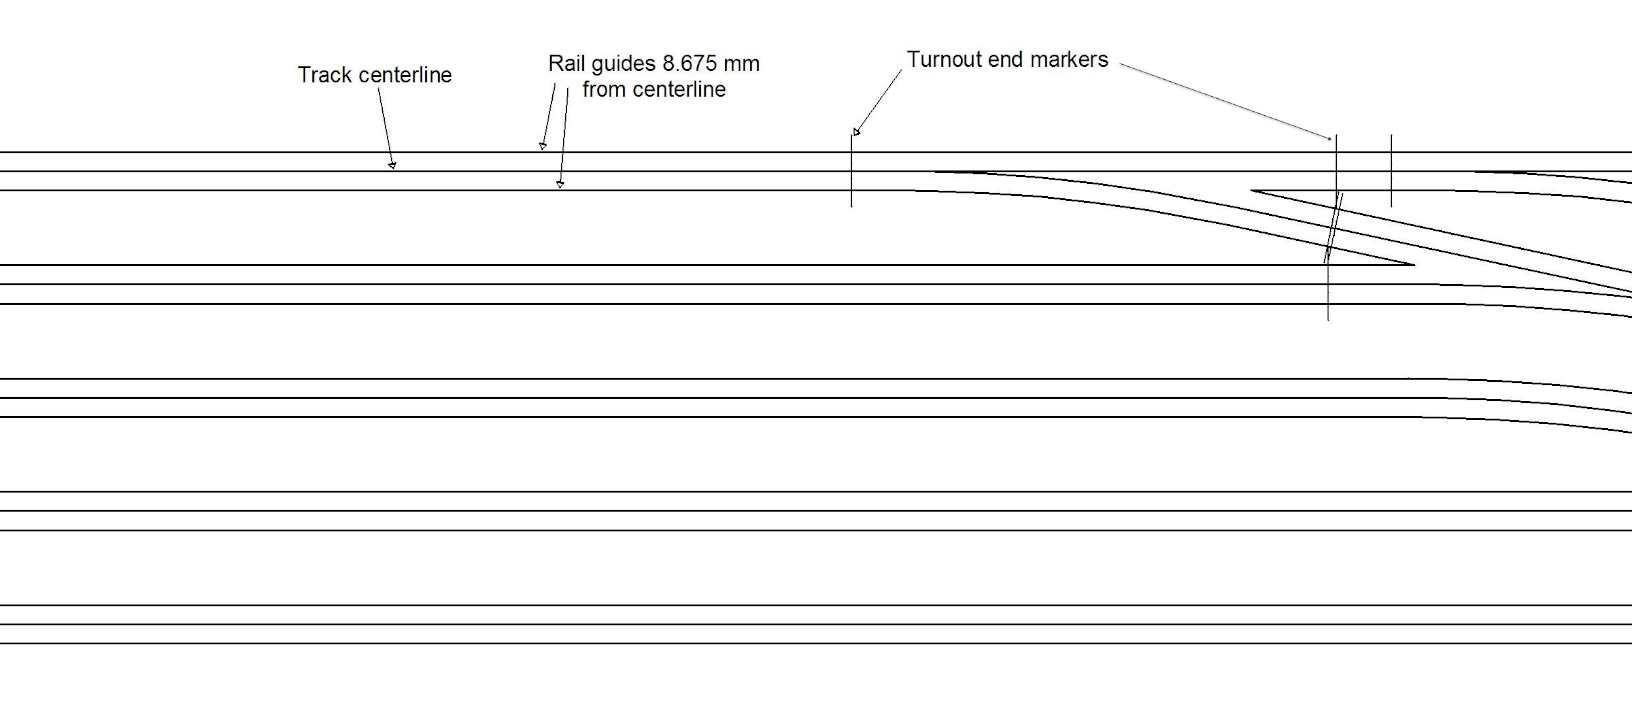
3rdPlanit does not have the ability to print directly to the laser engraver . For engraving one has to export in DXF format from 3rdPlanit and import it into Corel Draw . When 3rdPlanit exports to DXF format it only exports the track centerline and not the track rails or track endpoints . So one has to manually draw in the rails and end markers. I draw two rails , 8.675mm parallel to the centerline and draw in the turnout end markers as well . As we will see later, these are a great aid in accurately locating the tracks and turnouts while installing them ……
 click on pic
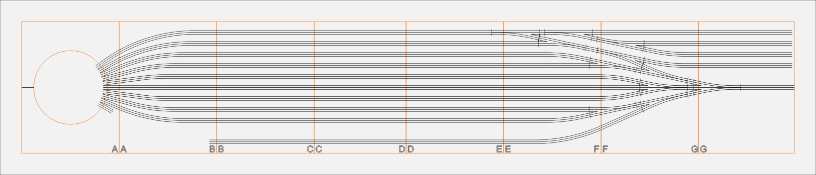
Now the DXF files can be exported and then imported into Corel Draw . i need to plan where the cuts need to be as i cannot cut the entire plan which is nearly 12ft in length, in one go. Keeping the laser engraver cutting table size of 32″ x 18″ WxL and the fact that the module is 24 inches wide , i divide the track plan into sections of 18″ x 24″ WxL as below …………
 click on pic
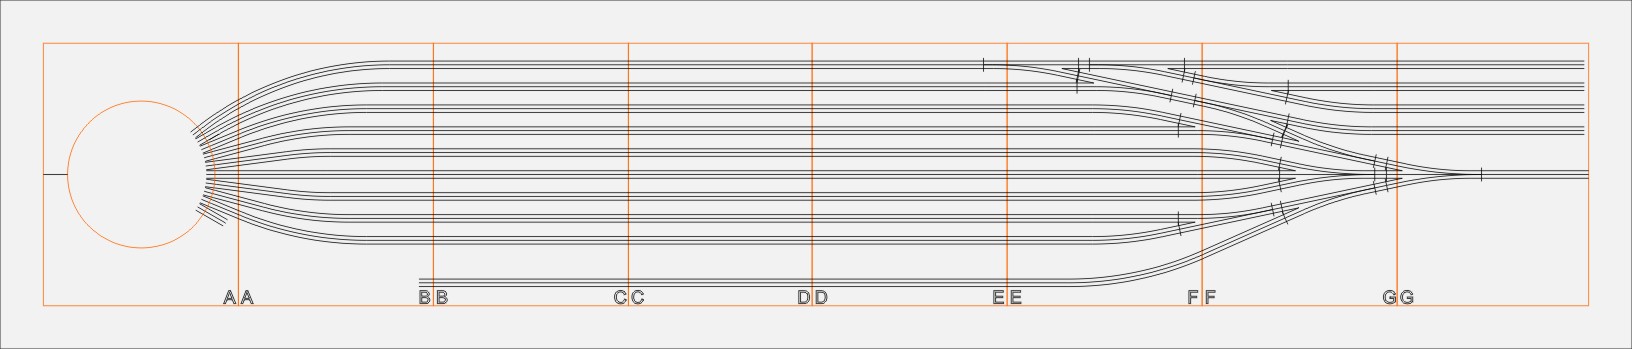
the laser will cut the orange lines and engrave the black lines ………

click on pic….
it took 8 sections of 18″ x 24″ WxL to cover the entire track plan . SInce each of them were to be cut individually i divided them up accordingly ……

click on pic
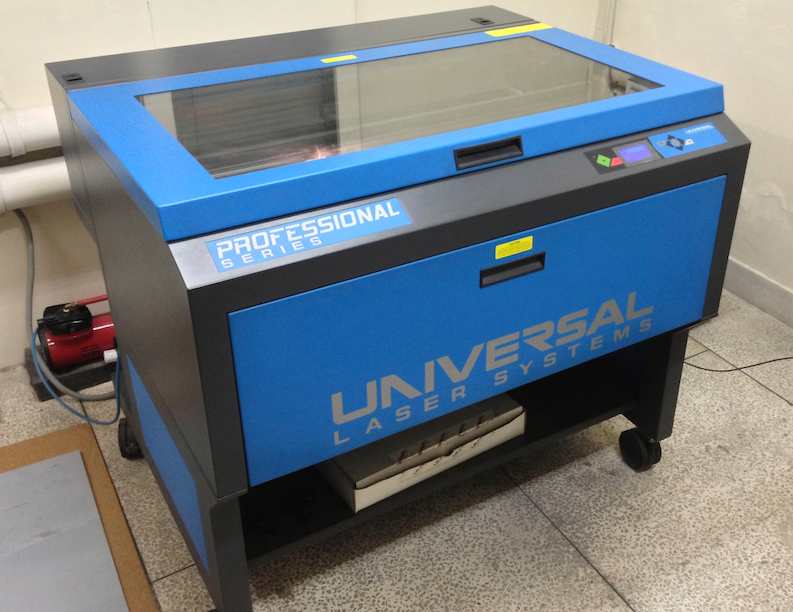
and then the laser cuts and engraves away ….. pretty fast … about 2 minutes per cork block…..

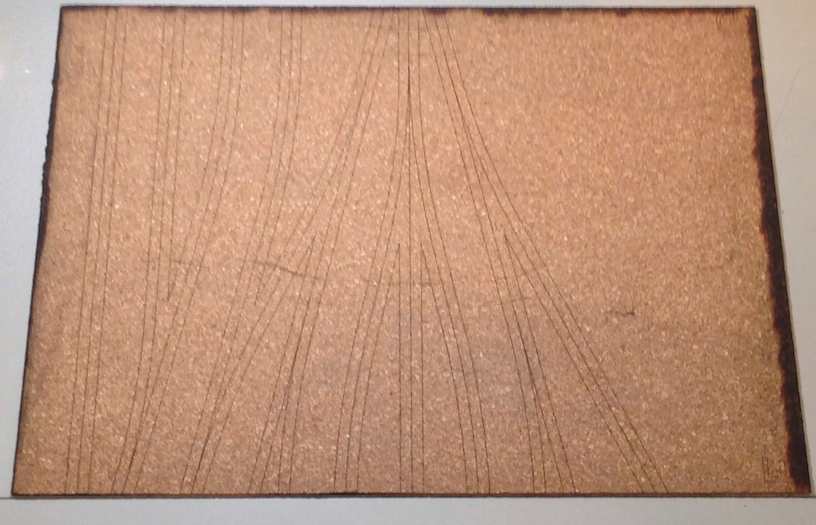
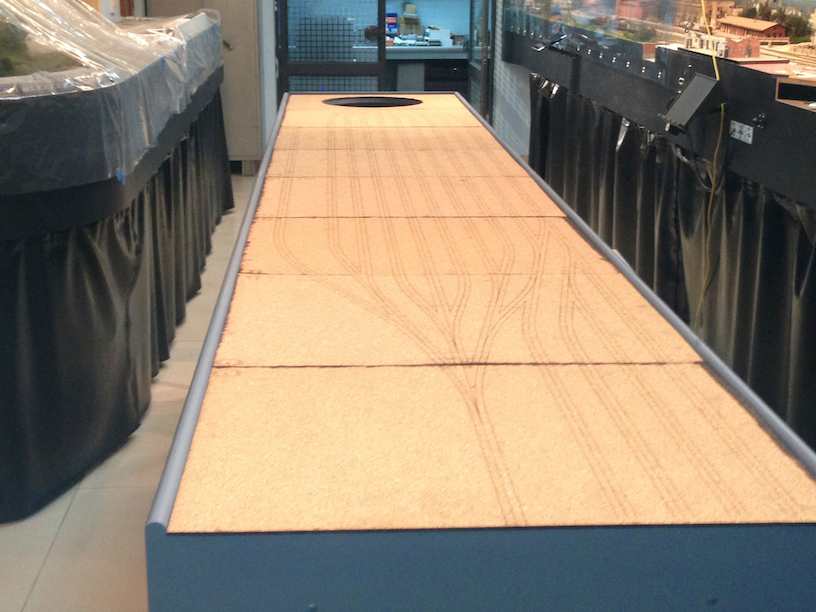
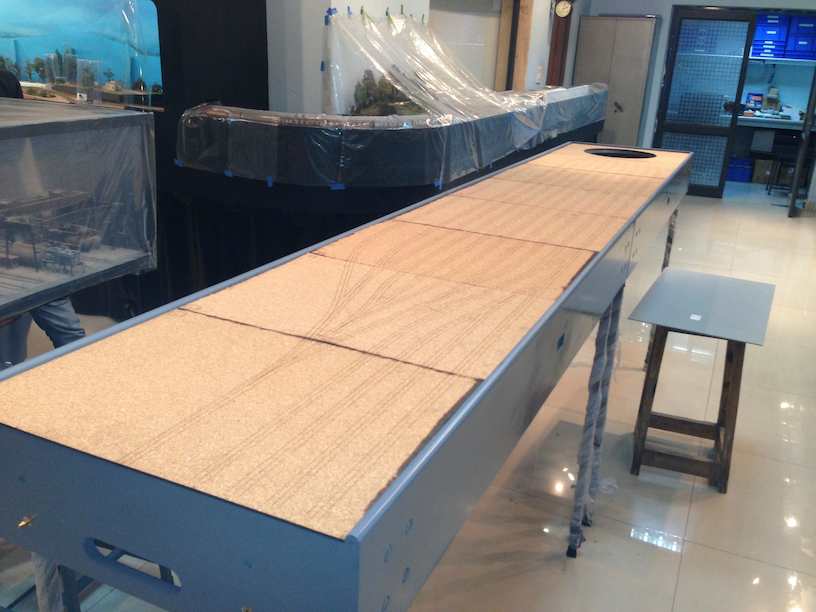
this is what the cut and engraved cork block looks like ….
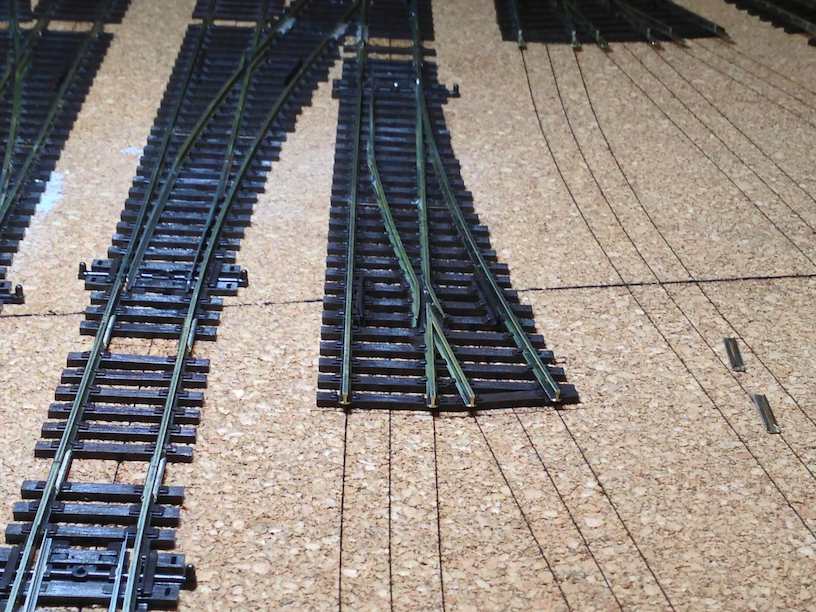
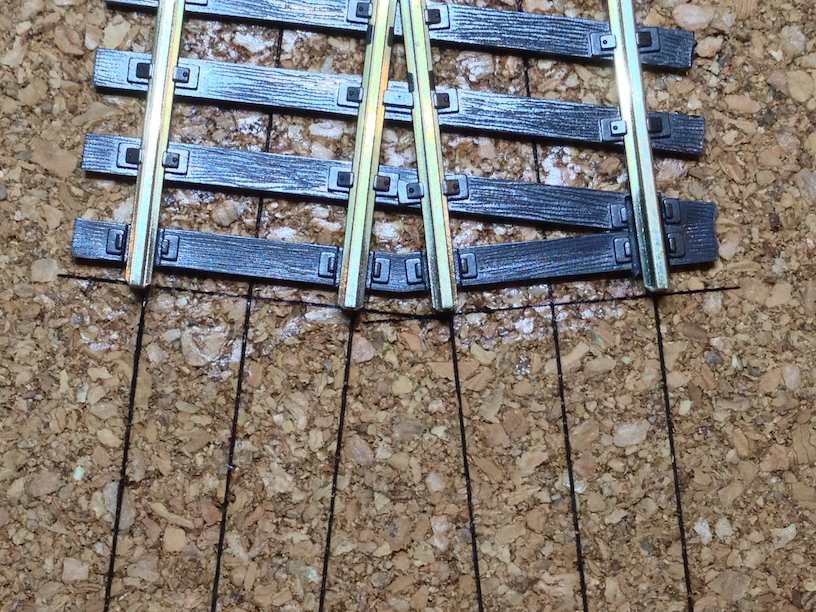
here is a close up of the turnout end point markers ……

and here we see the reasons for the turnout end markers and rail lines instead of just centerlines … ease of installation at later stages …..
The cork is installed using white glue …….
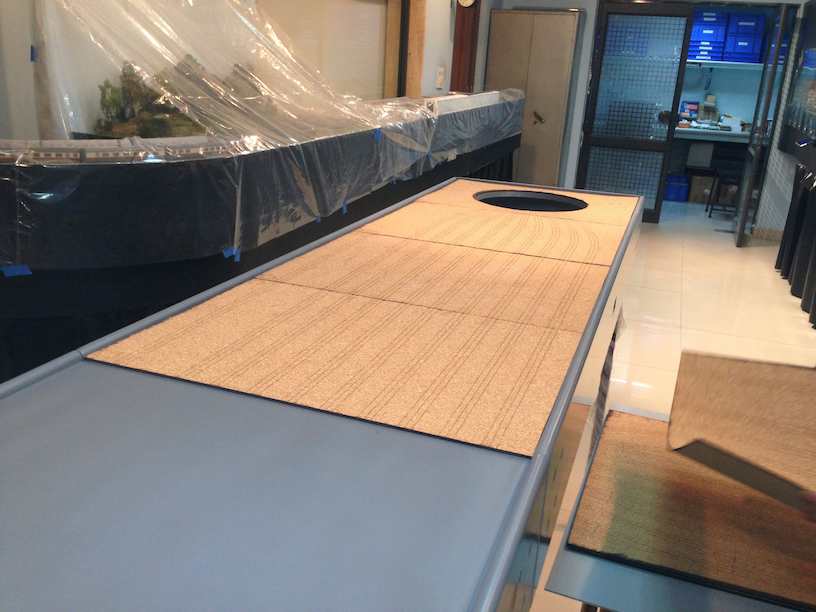
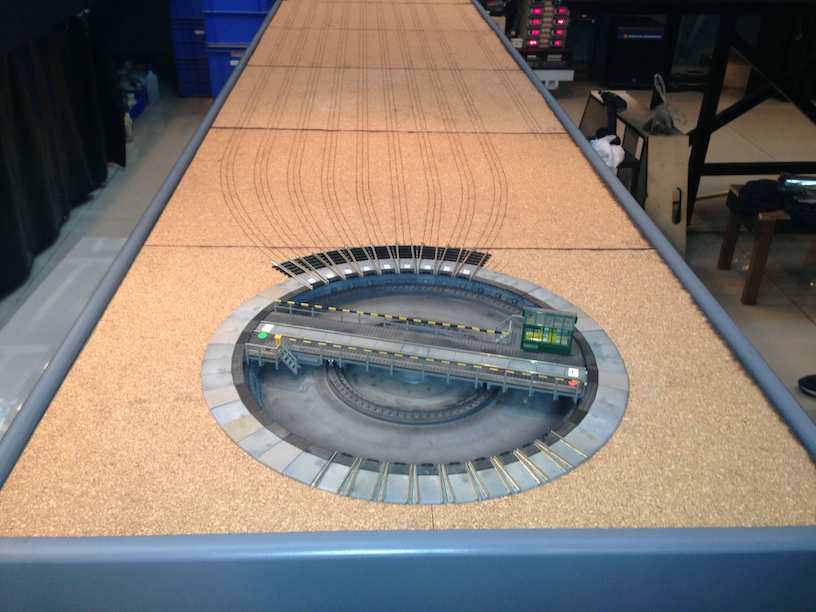
and the turntable test fitted ……
next in the series ….. installing electromagnets
previous in the series….module construction