Lighting the layout room is an often neglected area as most model railroaders want to get started with the actual building of the layout….. rather than waste time and effort on something which does not reap immediate dividends. However, I decided to dwell a bit on the lighting of the layout and I feel my efforts were well worth the extra time it took ……
To kick things off, here is a short video showing various lighting scenarios on the layout ……
I wanted to control all the lights through the DMX-512 protocol. DMX-512 was developed by the stage and theater lighting industry for simplified control of all the different kinds of lights they used. It involved using a central control desk/ computer which would control various dimmers and power packs which in turn would control the behavior of the lamps attached to those dimmer/power packs. A simple illustration can be found here and the complete description can be found here.
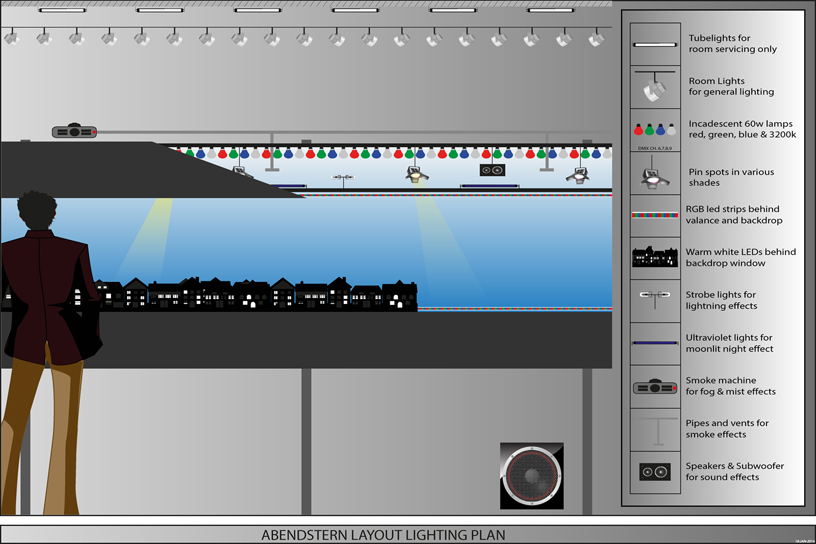
To give one an idea of how the lighting fixtures were laid out, below is an illustration…..
 click for bigger pic
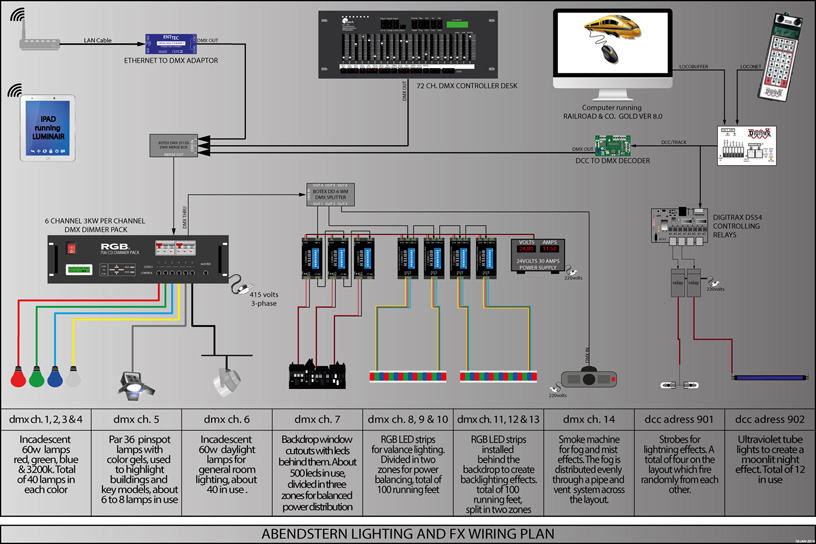
and here is a wiring plan for an even better understanding ……
 click for bigger pic
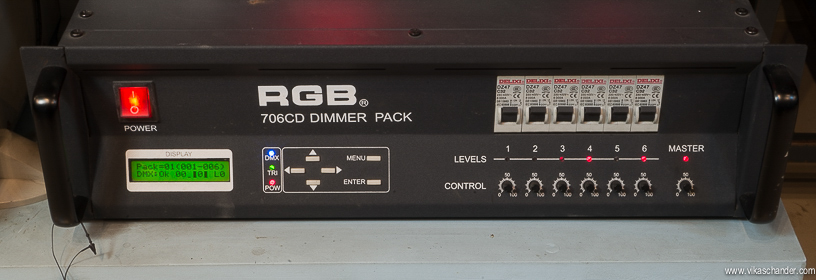
I installed a 6 channel, 3000 watts per channel DMX power/dimmer pack to control all the incandescent lamps which would draw a lot of current when combined.
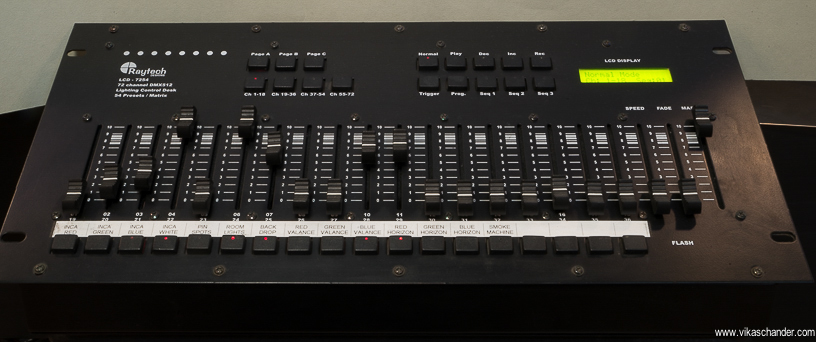
which in turn would be controlled by a 72 channel dimmer desk even though I use only 14 of those channels.
Another method of controlling the lighting was thru an iPad or iPhone running a program called Luminair. This is made possible thru a ethernet to DMX device by Enttec ( see inset )which basically allows a computer/tablet to communicate with the DMX network via LAN or wireless LAN….. i find this very convenient as i can be anywhere in the layout room and can control the lighting….
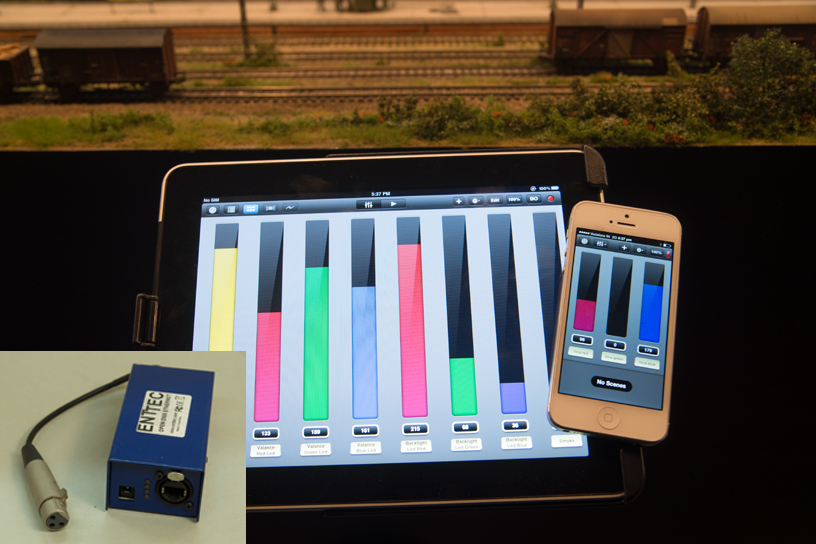
Channels 1 thru 4 would control the red, green, blue and white incandescent lamps installed behind the valance. There are forty 60w lamps in each color installed behind the valance and hence the need for the heavy power requirement in the DMX power/dimmer pack….
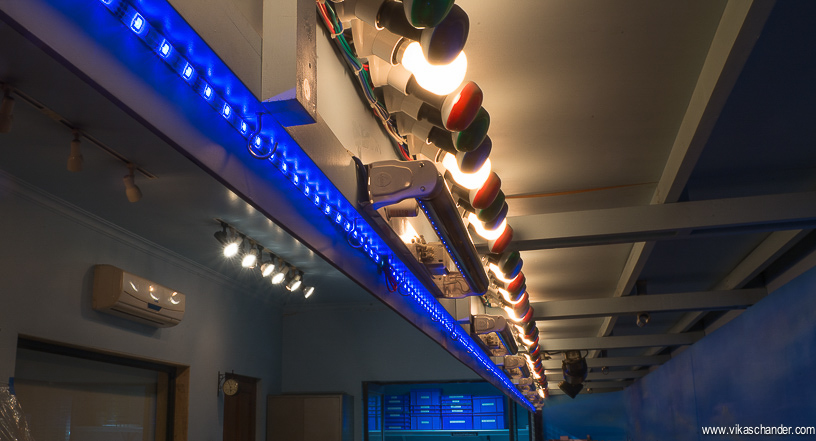
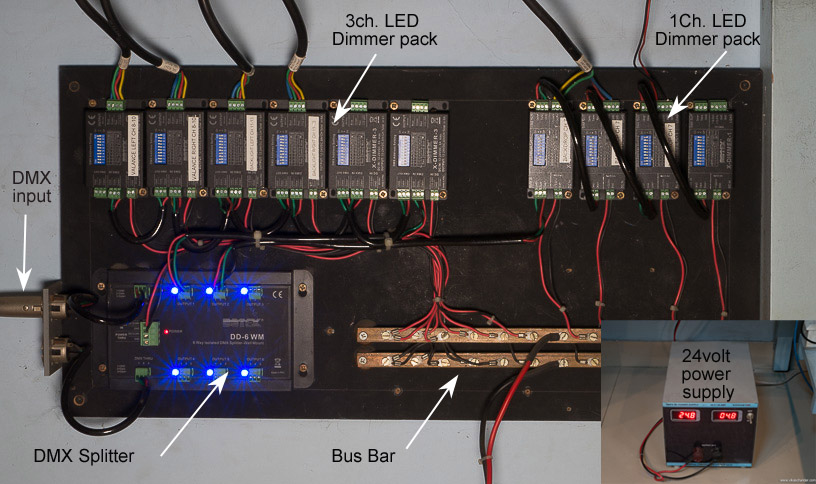
I also used some RGB led light strips behind the valance seen above. To control these LED strips a different kind of power pack/dimmer is required such as the ones seen below. These 1ch or 3ch. LED dimmer/power packs operate at 24 volts and their current draw is very high at 6 amps per channel and that dictated the use of a high current transformer rated at 24 volts and 30 amps ( see inset ). I also used a copper bus bar to handle the high current and distribute the power. A DMX signal splitter is also used to split and boost the signal so that all power packs get a non-compromised DMX feed…..
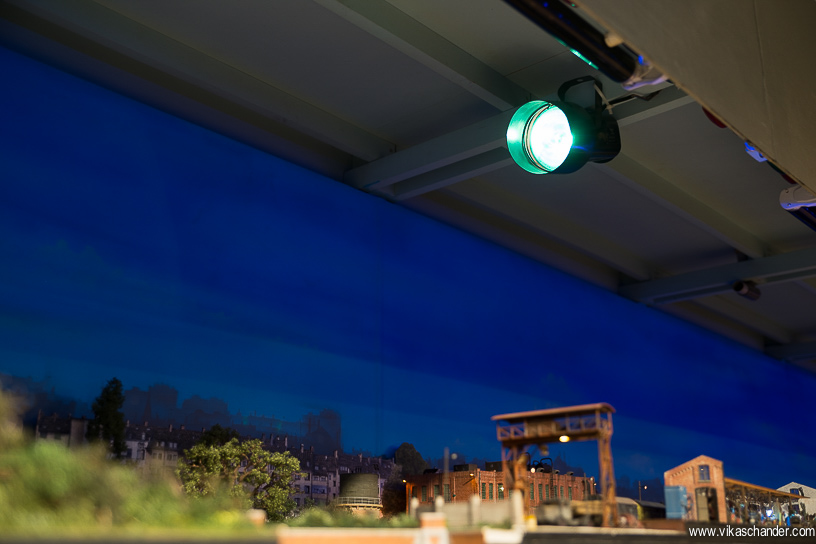
Par 36 pin spots help highlight signature scenes and key areas like uncoupling points especially when the rest of the lights are dimmed…..
Room lights, which I usually keep off when operating the layout so as to create a stage like effect, are installed on track lights. Of late, i am using six very high luminance LED lamps to provide even more lighting to areas i may be photographing or working on. The track lighting helps me to move them around the room easily as and when required.
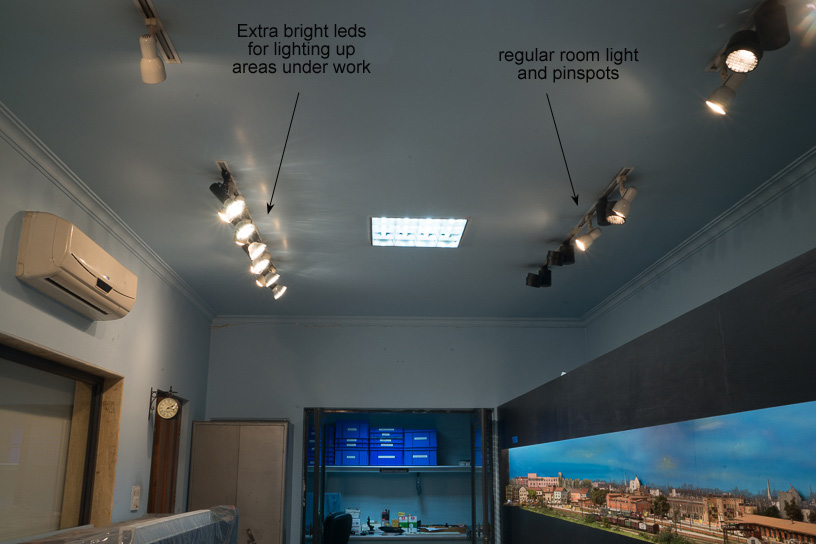
The tube lights see in the pic above are just for room servicing & cleaning and the switch for them is located right next to the entrance so that one is not walking blind into a dark room….
When I was installing the backscene cut outs, I also cut out some of the windows in the houses printed on the backscene……
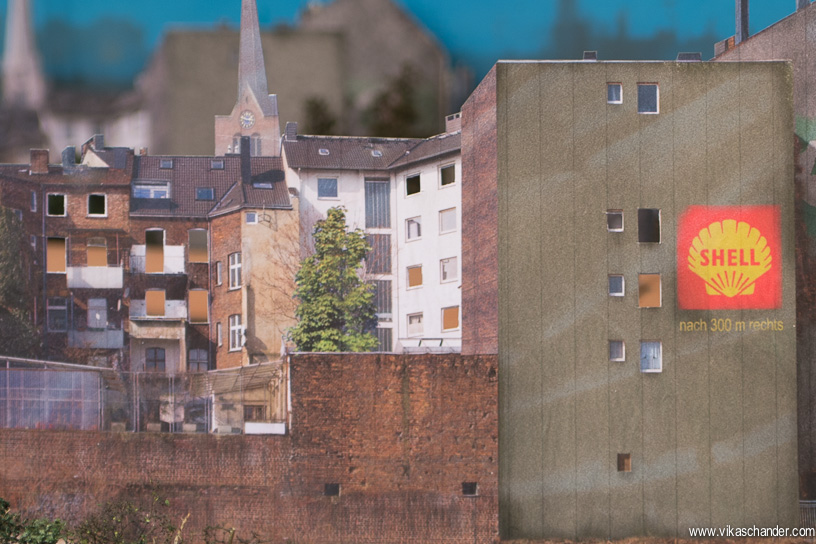
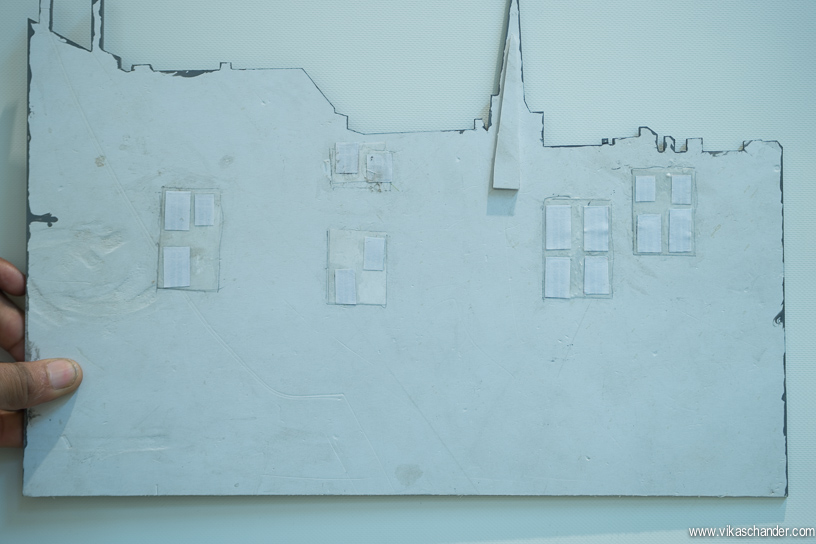
and installed small boxes with 12-volt led strips behind each of them…..
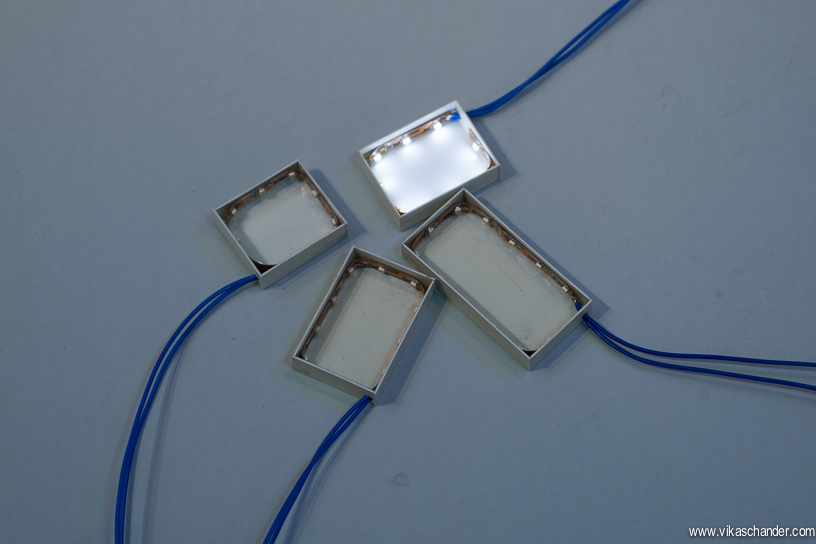
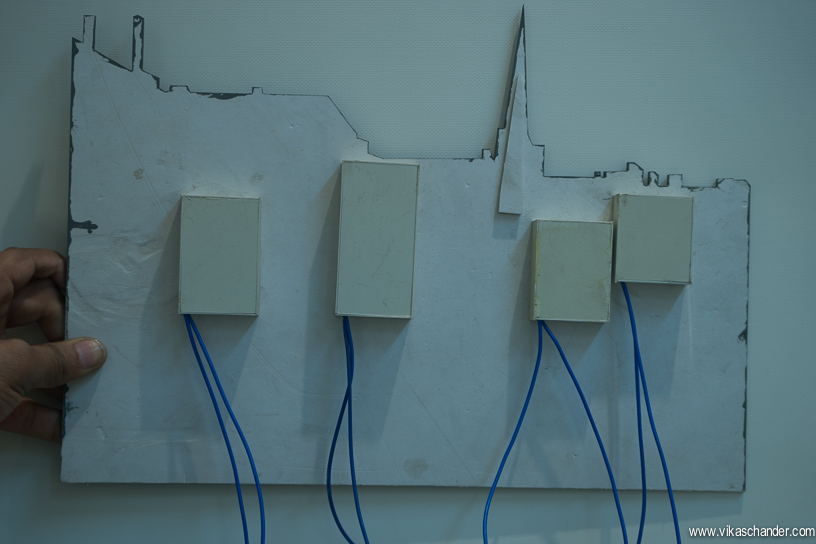
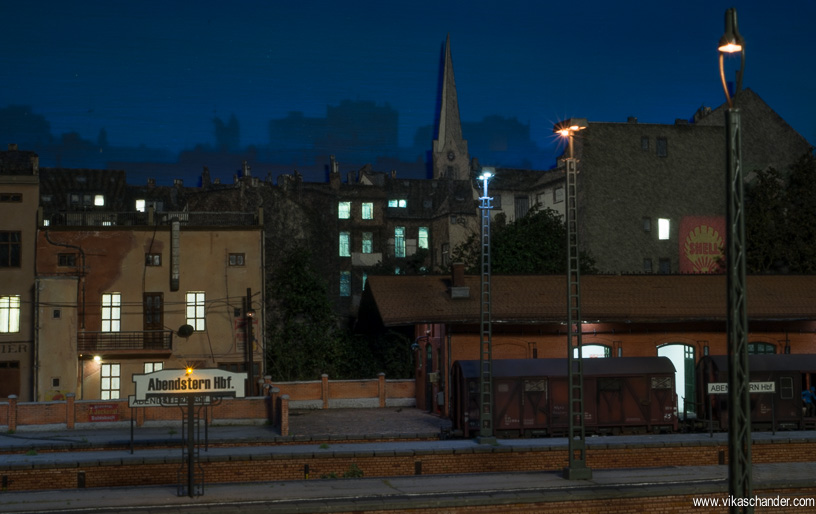
In a night scene when these leds are lit it gives a nice blending effect and the illusion of a bigger city scene with depth……
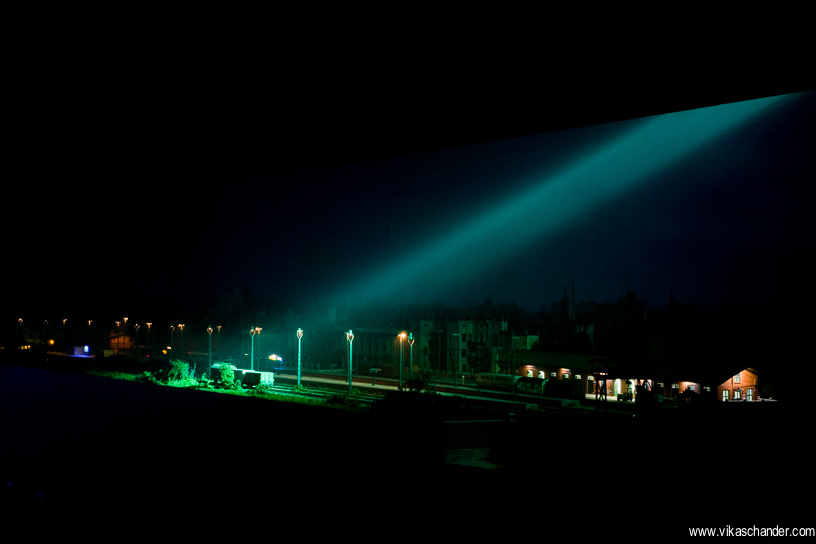
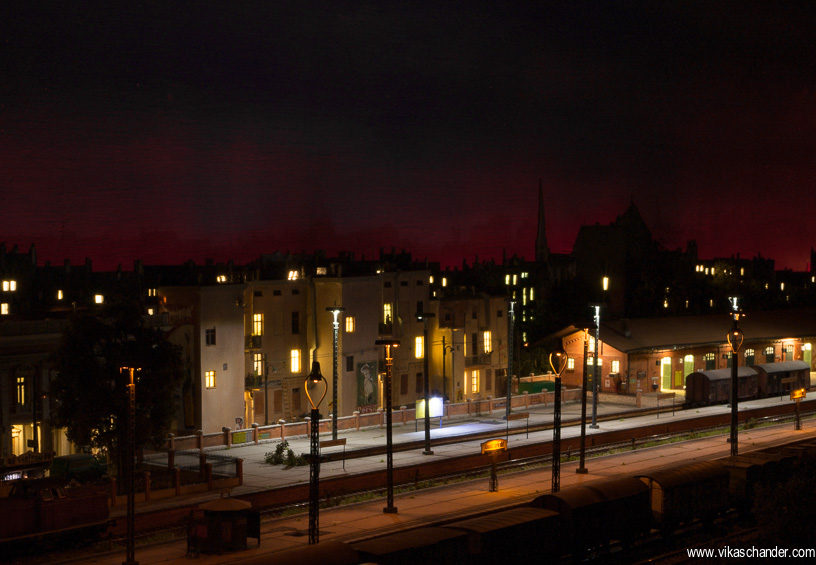
Another row of RGB led strips is installed between the backscene and the backdrop. I can vary the color by mixing the red, green and blue colors and create interesting effects which also enables me to create further depth in the scene. The red glow seen below prompted one of the visitors to call it the ” Great fire of London” scene…..
I also installed a smoke machine which rests above the valance….
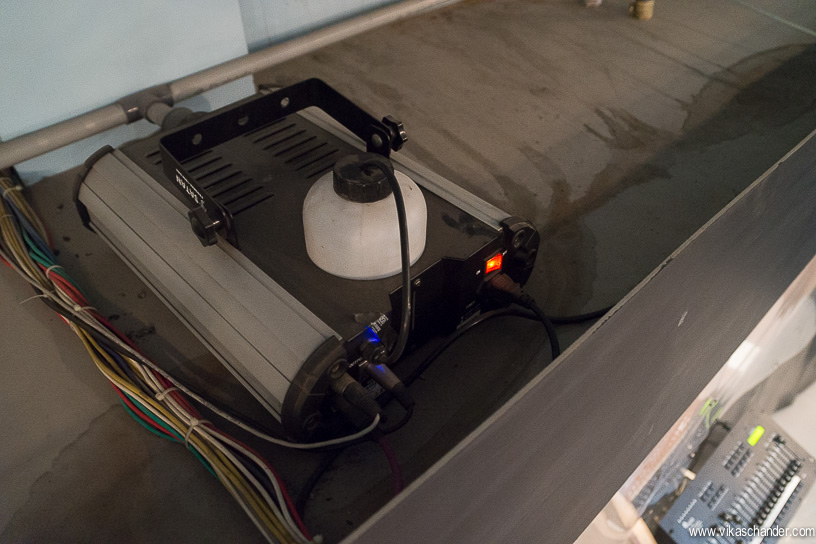
and rigged up a pipe and vent system to evenly distribute the smoke throughout the layout……
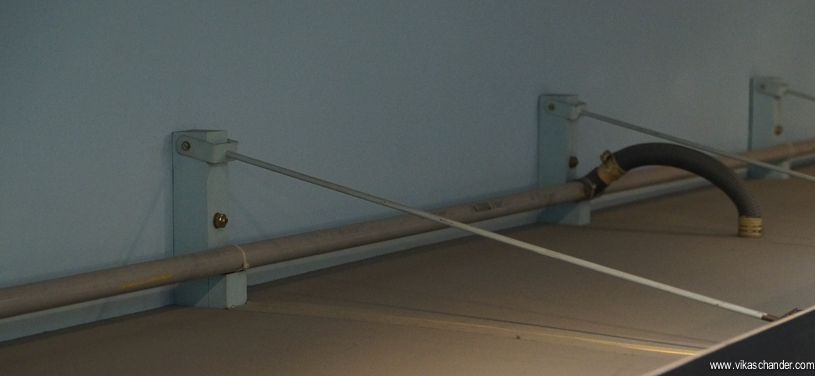
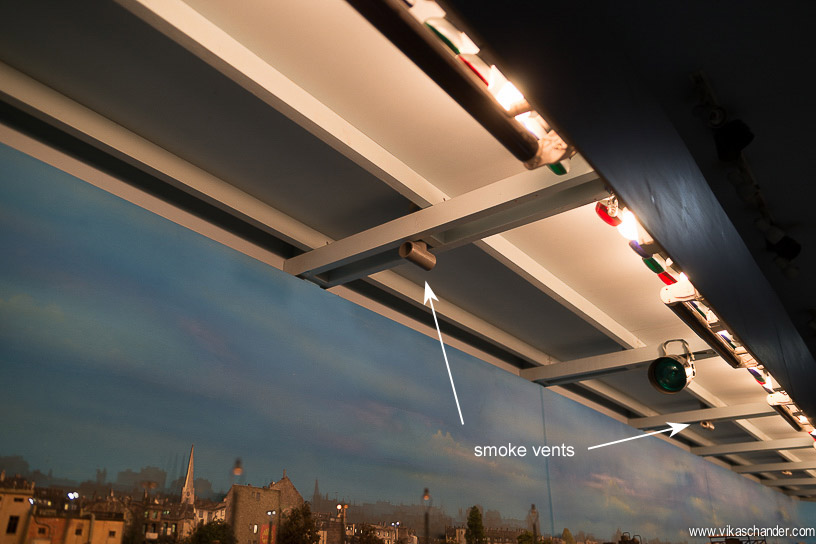
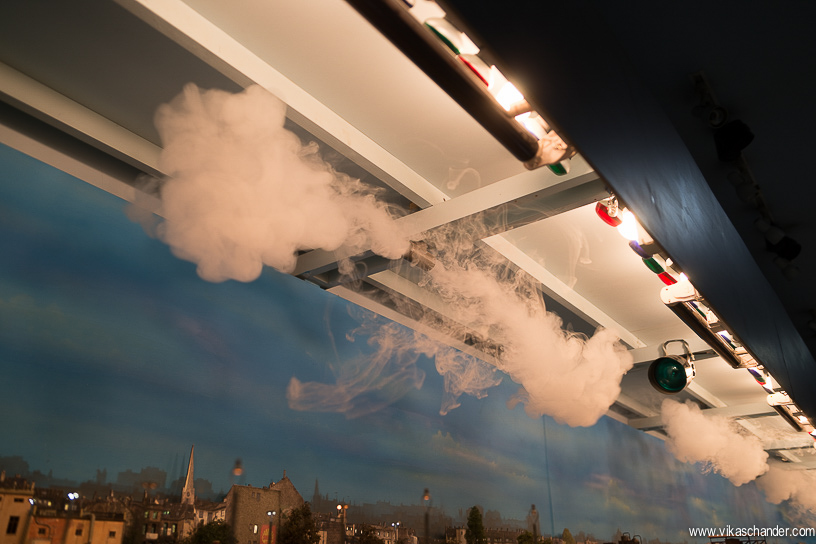
this gives us some nice scenes with atmosphere…..
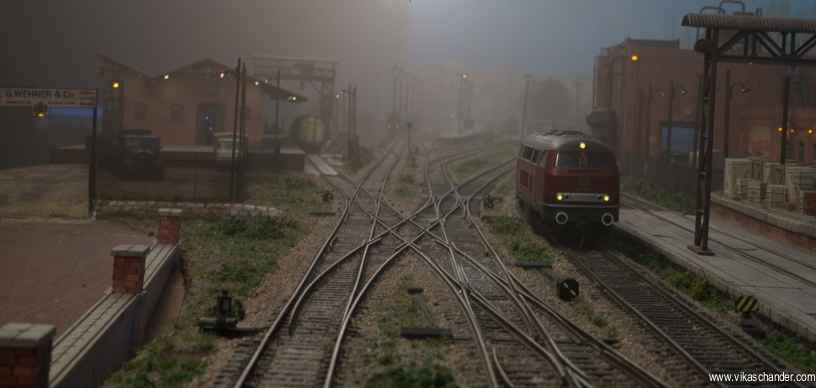
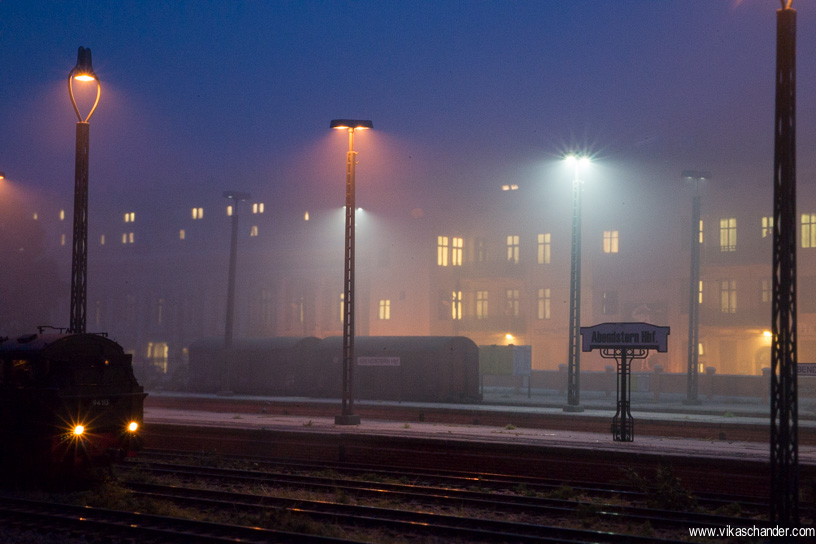
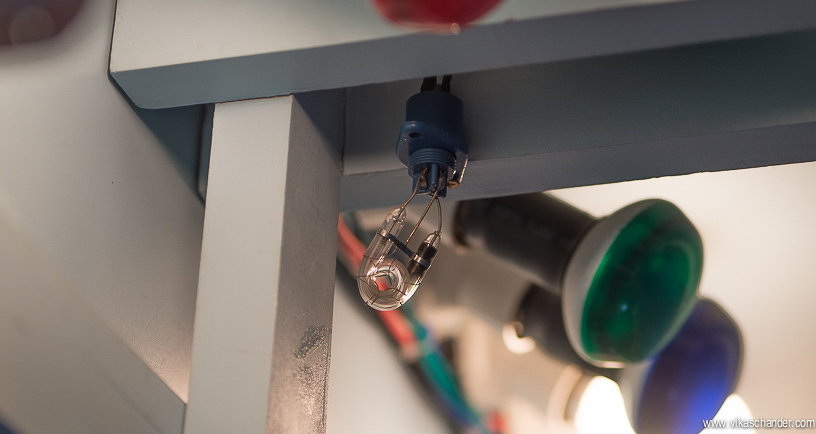
I have also installed a few strobes for lightning effects. The strobes are controlled by a Dcc address which is programmed into a Digitrax Ds-54 stationary decoder which in turn fires a relay switching 220 volts.
Another output of the Ds54 controls another relay which then switches on some ultraviolet tubes which I use sometimes in a moonlit night scene…….
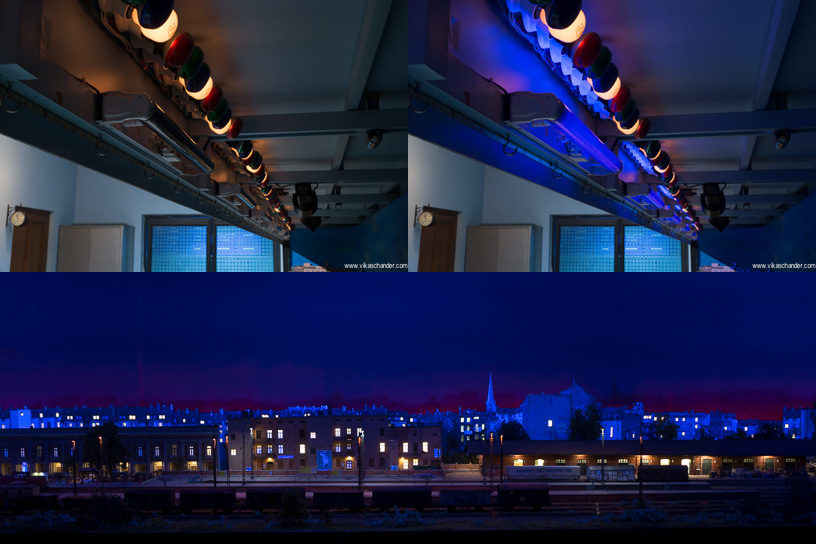
Things become interesting when the lighting control works in synchronization with the railroad itself, thru the Railroad and Co. Traincontroller software. To achieve this i first got hold of a DCC to DMX stationary decoder available from OpenDCC in a kit form which one has to solder and put together……
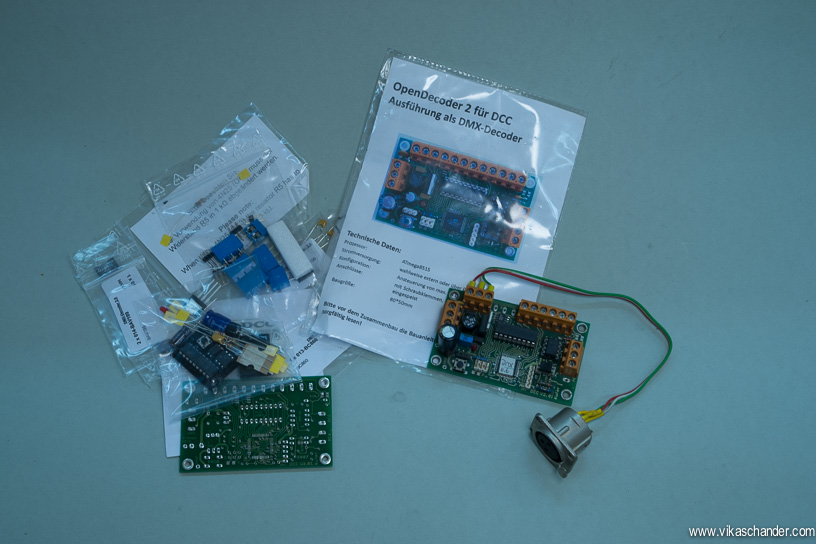
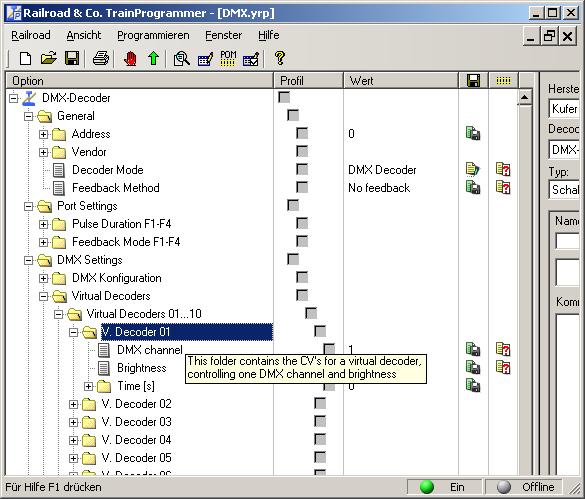
With this I am able to switch the various DMX channel lights to on or off, set their brightness levels and also the time it takes for them to reach their brightness levels or then dim down to zero level. One of course needs to program this first into the decoder and that can be a time consuming and painstaking process. This is made a little easier by a decoder profile provided by OpenDCC which can be be loaded into Freiwald Software’s Train Programmer.
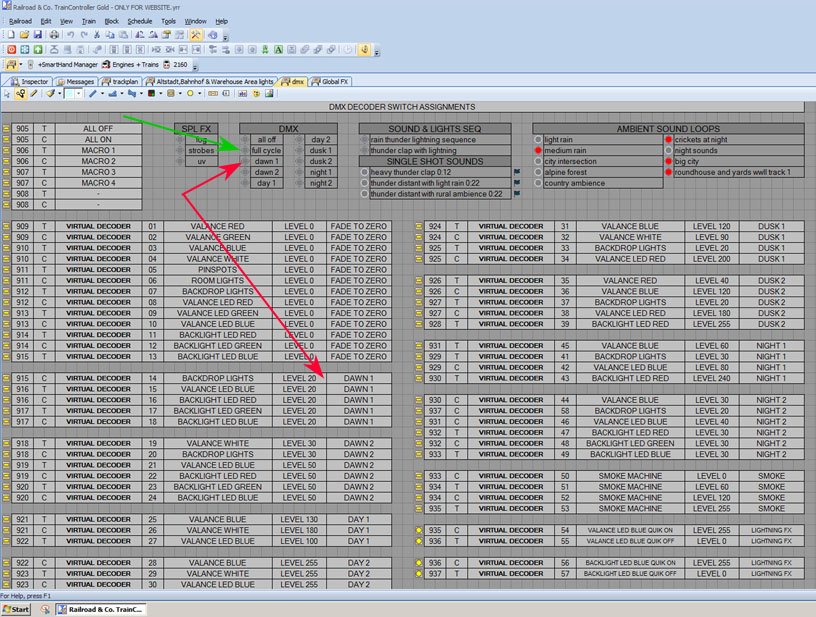
Next i need to set up the various combinations of switches which would give me the scenes i want. For example, in the screenshot below we can see the long red arrow point out the settings for Dawn 1 and the switches which have been assigned to those levels….
 click for bigger pic
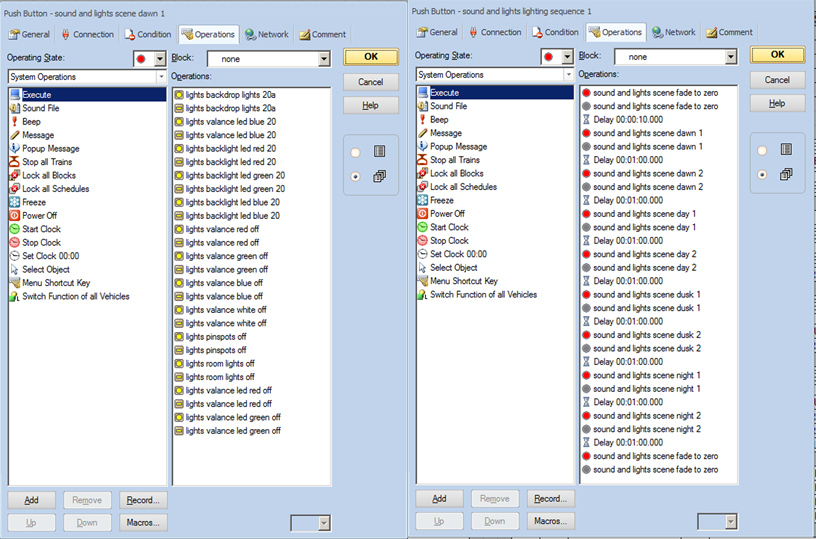
The short red arrow in the screenshot above points to the push button which calls up the Dawn 1 scene and in the left screenshot below we can see how the scene for Dawn 1 has been programmed into the button for Dawn 1
 click for bigger pic
Yet another button (pointed out by the green arrow) has been programmed to provide a whole cycle of scenes from complete darkness to dawn, day, dusk and night and back to complete darkness. The right screen shot shows how this was programmed and the whole cycle would take about 12 minutes. One could of course vary this to taste …. and once timetabled operations come into play on the layout then these various ” time of day ” lighting scenes can also be synchronized to the timetable.
To compliment the lighting system i also added a 4.1 channel surround sound system complete with a subwoofer. (see inset)
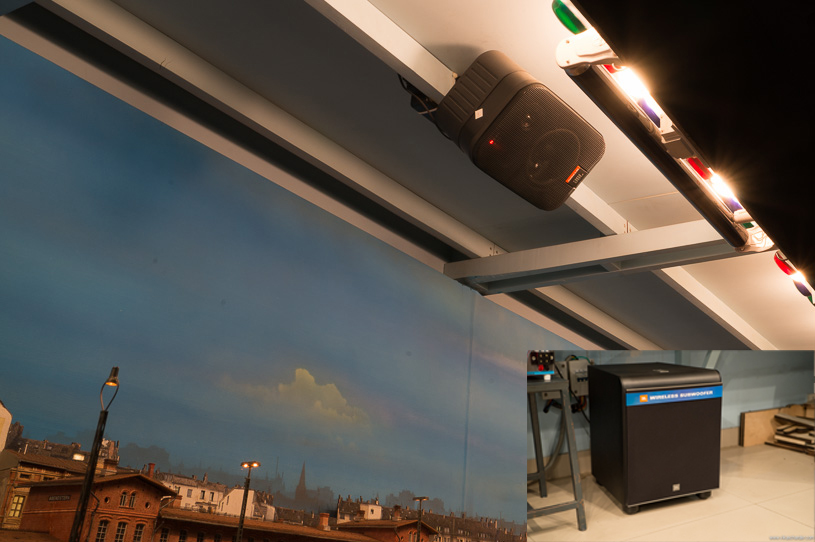
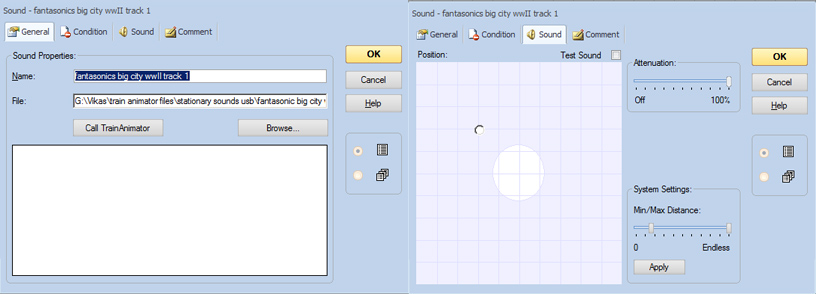
….and i have programmed in a couple of thunder and lighting sequences, some rain sound sequences as well as some city and countryside ambiances. All of these are programmed into the Traincontroller software and can be triggered by the buttons or switch addresses. The soundtrack i used was from Fantasonics who have a nice collection of ambient sounds suitable for city as well as the country side…..

Using +4d sound from Freiwald Software i can position each of these ambient sounds into any of the 4 speakers. For example the city sounds play only from the speaker which is located above the city scene, the yard and roundhouse ambient sounds play only from the speaker nearest to the roundhouse and industry scene and so on and so forth with the rural ambient sounds . On the other hand the thunder and rain sequences play from all the speakers.
All of the above elements come together to create a pleasing effect and contributes greatly to the drama of model railroading ……
Hi Richard
thanks for your appreciation !! .
The fog is from a machine similar to what they use in discos and night clubs. The smoke is actually dry so there is no problem with the humidity of it. I have had it in place for about 2 years now and there is no problem with the operations of the layout .
Of course when it get very foggy the signals get difficult to see – just like on the real railways !!
cheers
vikas
Hi Vikas,
incredible, simply everything you have installed, and with what excellency !
But I do have a question. How do your electric switches, signals, etc. cope with humidity of fog streaming out from smoke machines ? Don´t they clog-up mechanical and electrical connections after a short while ? As far as I know, humidity is a great problem within a railway layout. How are your experiences and what did you do to avoid these problems please ?
Thank You in advance for your kind cooperation.
Best Regards,
Richard.
Dear mr Chander
I’m develloping a light conception for a quit big model railway in Lausanne. I’ve seen your blog and the layout lighting plan : it loooks very well done and structured.
May I ask you some questions :
1. you use quit a big part of incadescent lightsources… how do you manage the heating of the space ?
2. How high is your ceiling from the area surface and from the floor surface ?
I tried to call you by telephone before… but I couldn’t keep the connection…
3. Do you speak german ? Do you have a skype adress ?
I hope we can have some contact to discus some interesting themes about good lighting for model railway, which seems to be underdevelopped at the moment…
Best regards
Bert De Raeymaecker
00 41 76 396 03 31
A M G
Ateliers de Maquet Goemans
well – as I have mentioned many times before, this is the best layout in this country, as far as I have known. I feel proud! I will consider myself lucky if I can ever match your standards!
Extremely well thought out, elaborate lighting set-up. The end effect in most cases is totally realistic especially the night scenes and the mist and fog situations. However, the extreme saturation and luminosity in some cases e.g..blue/violet/purple effects, though attractive, are a little over the top (IMO).
Great job as usual!!!!